To organize photos on a Mac in Apple Photos, put pictures into albums, then group related albums in folders. Start with one year or a few recent shoots. Give each album a name you'll know when you come back to it.
This lesson starts with pictures already in the Photos app. You'll make a small system you can use again, with a practice task at the end. The steps below follow Apple's Photos guide for macOS Tahoe 26. Menu labels can vary by version.
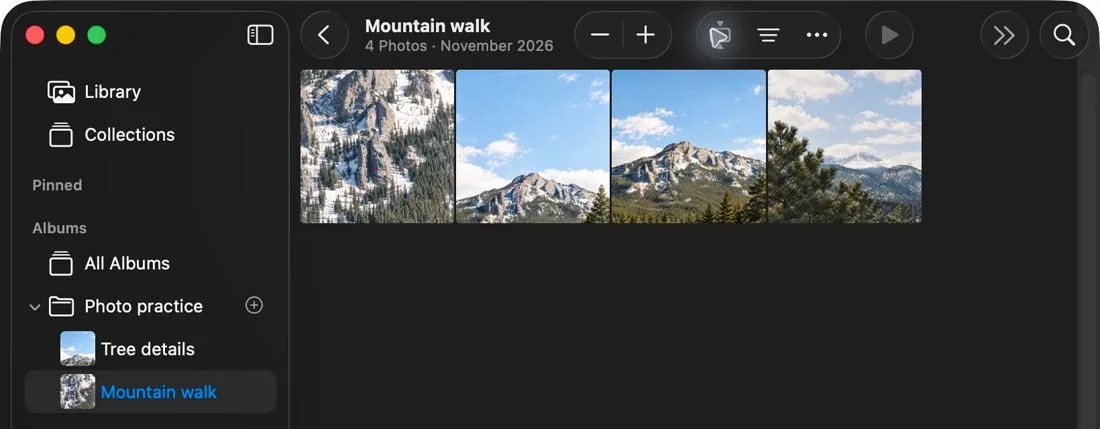
Sample library: Mountain walk holds four photos. Two also appear in Tree details.
Know what the library, an album, and a folder do
Think about what you want to find. Photos gives you a few ways to group pictures:
| Part of Photos | What it holds |
|---|---|
| Library | Your collection of photos and videos. |
| Album | A group of pictures you choose. One photo can belong to more than one album. |
| Folder | A group of albums. You can also place folders inside other folders. |
For example, you could make a folder called 2026 photo walks. Inside it, keep an album called October garden walk and another called November town walk.
Those names are examples. Choose the detail you tend to remember: the place, the person, the season, or the job. If you ask yourself, “Where are the pictures from the garden?” put garden in the name.
Start with one group you can finish
Choose a set you recognize. A recent walk, one practice session, or a month of phone pictures gives you a clear place to begin.
Decide what belongs in the group before you sort it. For a garden walk, include the wide views, close flower photos, and details from that outing. A later walk can have its own album, even when you went to the same garden.
Keep a backup in place before any cleanup. Apple's photo-library backup guide explains local backup options, including when you use iCloud Photos. Files stored outside the library need their own backup. An album is a way to group pictures, not an extra backup copy.
Make an album for that group
Apple's album guide gives these steps:
- In Photos, choose File > New Album.
- Name the album, then press Return.
- Select pictures in the library and drag them to the album in the sidebar.
Open the album and look through it. Does the name describe the pictures inside? If two outings have become mixed together, decide whether they belong together or need separate albums.
You can keep a second album for a different purpose. For example, an event album can hold the outing, while a Flower details to study album holds pictures you want to look at closely. Add a fitting photo to both when both uses matter to you.
Group related albums in a folder
To make a folder, move the pointer over Albums in the sidebar. Click the More button, then choose New Folder. Name it and drag your albums inside. Apple's folder guide shows the current controls.
Choose one main way to group albums. You might use years, places, or types of photography. A year folder can work well when you remember when something happened. A place folder may fit a long project you return to each season.
Start with the structure you need today. You can add another folder when you have albums that belong in it. A folder with a clear name and two useful albums is enough to begin.
Choose the order inside an album
With the album open, choose View > Sort, then choose oldest or newest first. You can also drag pictures into an order you choose.
Date order can help you follow a walk from start to finish. A chosen order can help you study a set: a wide view, a closer frame, then a detail. Pick the order that helps with the reason you made that album.
Try the album as if you were returning a month from now. Find one picture without scrolling through the whole library. If you open the wrong album first, change a name that confused you.
Check the command before you remove anything
Removing a picture from an album leaves it in the library. Deleting an album also leaves its pictures in the library. Deleting a picture from the library is a different action.
Read the command before you confirm it. This organizing pass can stay focused on grouping and finding pictures. Choosing which files to delete can wait for a separate review, with backups checked first.
Try it with two albums
Choose ten to twenty pictures from two outings or practice sessions already in Photos.
- Make one album for each session.
- Give both albums names you can recognize.
- Put them in one folder.
- Choose one picture to add to a second album for study.
- Return to the library, then find that picture through each album.
Finish by checking the names. Can you tell which album holds each session? Can you find the photo you wanted? Keep the parts that helped, and change the names that sent you to the wrong place.