An 8x10 photo gets cropped when your picture has a different shape from the paper and the print is set to fill it. To keep the whole picture, choose a print size with the same shape or fit the image on the paper with margins.
You have a third choice, too: choose the crop yourself. The right option depends on what you want to keep and whether the print needs to fit a frame you already own.
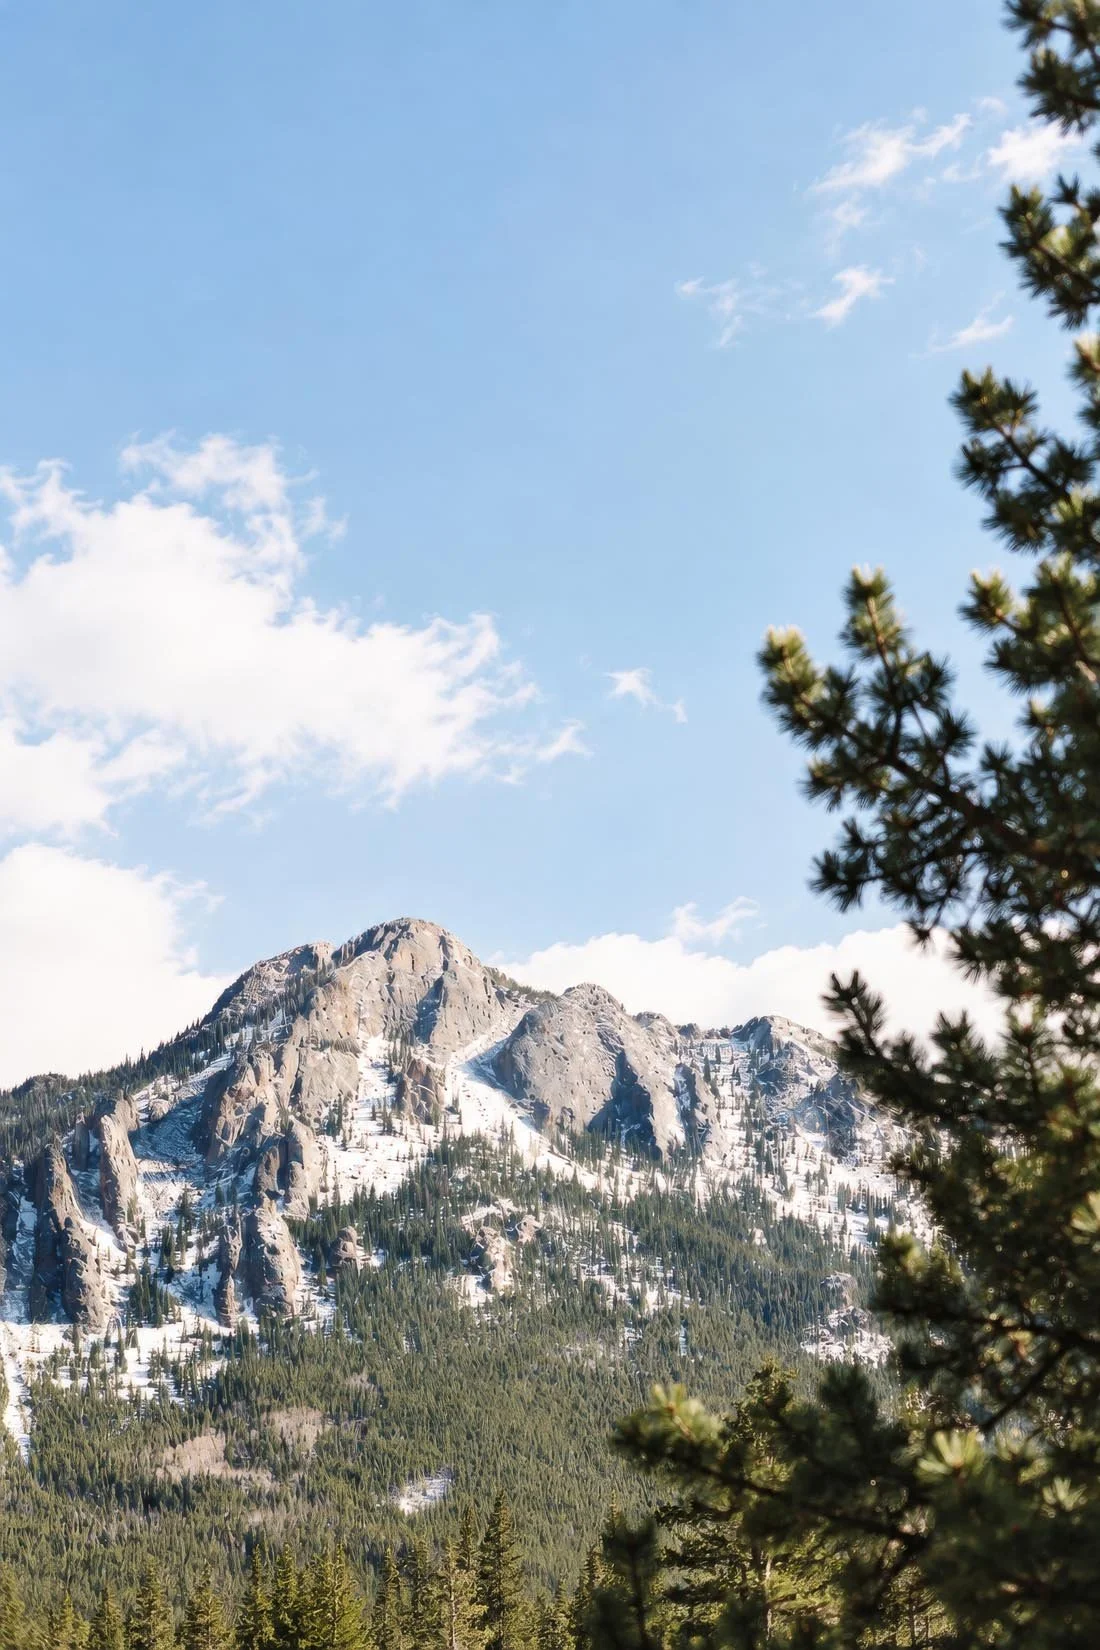
The full photo has a 2:3 shape. A 4x6 or 8x12 print has the same shape.
Compare the shape of the photo and the paper
Aspect ratio means the shape of a picture, written as its width compared with its height. A tall photo with a 2:3 ratio is two parts wide and three parts high. A 4x6 print and an 8x12 print have that same shape.
An 8x10 print has a 4:5 shape. It is less tall for its width. If you fill that paper with a 2:3 photo, some of the top and bottom must fall outside the print.
| Portrait print size | Shape | Fits a full 2:3 photo edge to edge? |
|---|---|---|
| 4x6 inches | 2:3 | Yes |
| 5x7 inches | 5:7 | No |
| 8x10 inches | 4:5 | No |
| 8x12 inches | 2:3 | Yes |
These are shape matches. Printer margins or borderless settings can still affect the edges. Canon's print-area guide explains how a borderless mode can enlarge the image and trim its edges. Turn the photo and paper sideways and the same idea applies.
Your file may have another shape, especially if you have already cropped it. Start with the file you plan to send. ShootProof's guide to print shapes and cropping lists common ratios and explains why you should check a lab's crop before approving an order.
Choose a matching print size to keep the full frame
If keeping the whole scene matters most, look for a paper size with the same shape as your photo. For the tall mountain photo here, 8x12 keeps the full 2:3 frame. An 8x10 edge-to-edge crop needs to leave some of it out.
Check the frame or mat opening before ordering. A mat is the card border inside a frame. Its opening can cover a little of the print, so leave room around a detail you want visible.
Keep your original file. Make a separate copy for each print size so you can return to the full photo later.
Keep the whole photo on 8x10 paper with margins
If you need 8x10 paper, you can fit the whole image inside it. A 2:3 portrait leaves space at the sides when fitted on 4:5 paper. That space can stay as a white border.
For a centered fit on an ideal 8x10 sheet, this photo would be about 6⅔ inches wide and 10 inches tall. It would leave about ⅔ inch at each side. A printer's required margins can make the image smaller.
Look for a fit or full-image option in your lab's order screen. Labs use different names, and some products only offer an edge-to-edge crop. Check the preview and the product's border options before paying.
On a Mac, Apple's Preview printing guide shows two choices under Scale to Fit:
- Print Entire Image fits the full image within the paper.
- Fill Entire Paper fills the paper's shape and crops the image when the shapes differ.
The guide follows macOS Tahoe 26. Available paper sizes, margins and borderless controls depend on your printer. Check the paper size in the print dialog as well as the fit setting.
Choose the crop when an edge-to-edge 8x10 matters
If you want the image to fill an 8x10, choose a 4:5 crop on a copy of the photo. Move that crop to keep the parts you care about.
In this mountain example, the crop keeps the peak and the pine at the right. It removes some sky and foreground. Another position could keep more sky and less forest. Try both before you decide.
Check all four edges. Look for a cut-off face, a hand near the border, or a detail the mat might hide. Jordan's travel photography lesson explains why an object at the edge can help tell the story. Keep that in mind before trimming it away.
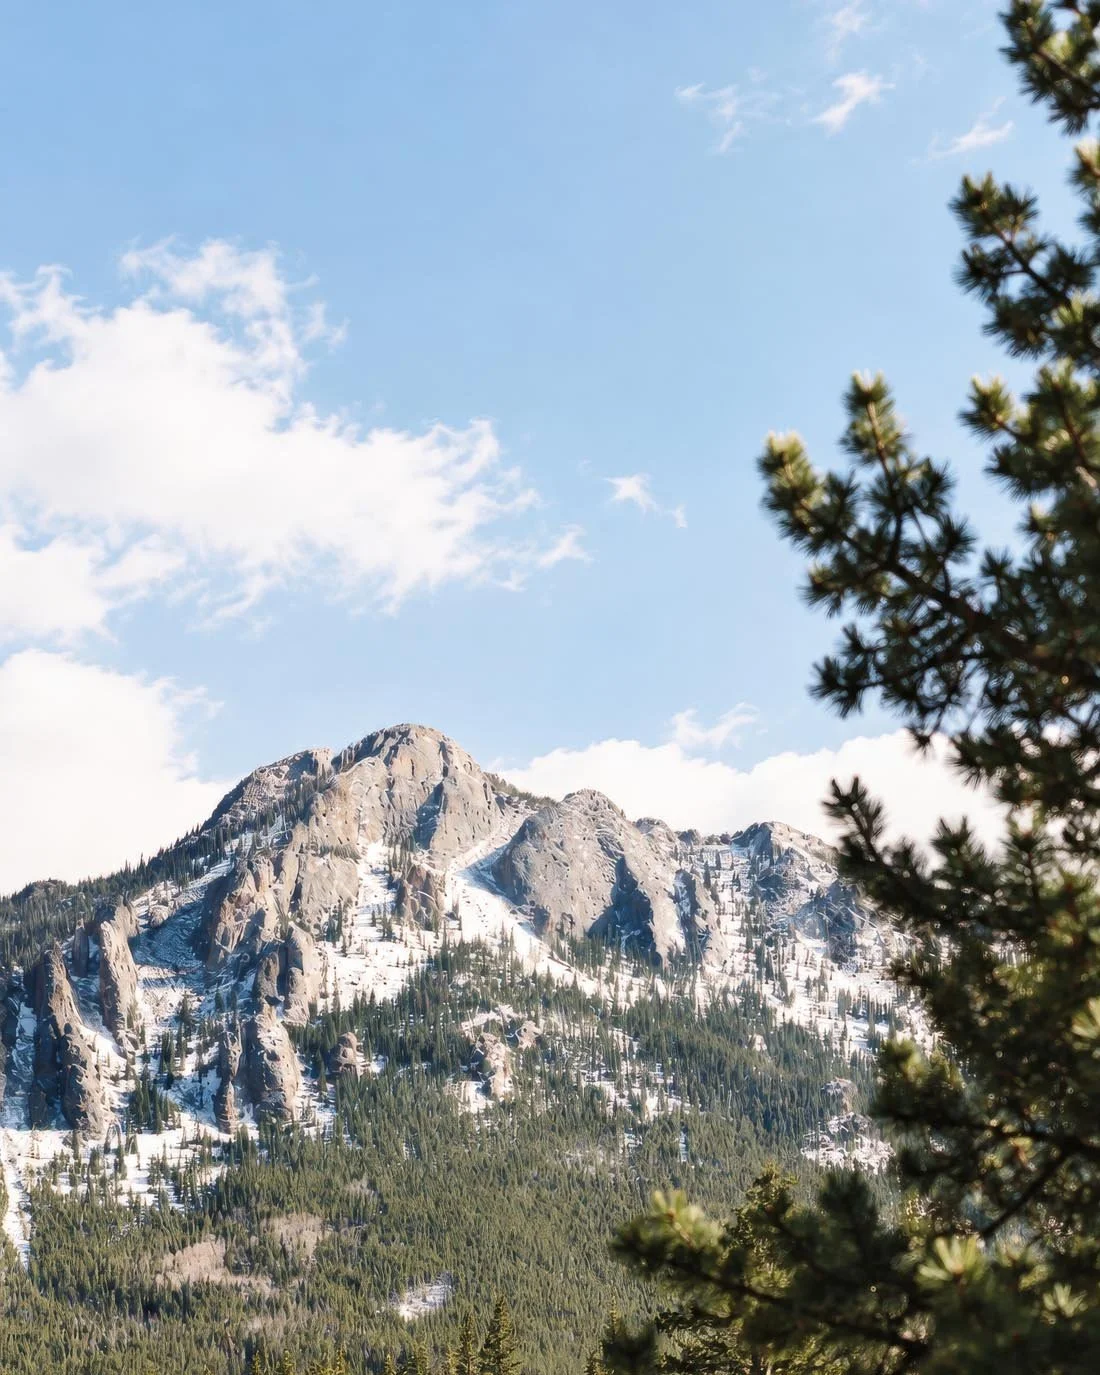
This 4:5 crop keeps the peak and pine while removing some sky and foreground.
Check the order preview before you pay
Open the preview for the exact size and product you chose. A preview for one print size does not clear every other size in the order.
- Confirm the paper size and orientation.
- Check whether the order fits the whole image or fills the paper.
- Move the crop if the order screen allows it.
- Check the edges again after any change.
- Look for a separate warning about file resolution.
A shape mismatch and a resolution warning are different problems. Adding pixels or changing a pixels-per-inch number does not change a photo's shape. Stretching the image to force it into the paper changes the proportions of everything in it.
Try the three choices on one photo
Choose a photo you want to print. Keep an untouched copy, then compare a matching print shape, a full-image fit with margins, and a crop that fills 8x10 paper.
Write down what each choice keeps or removes. Then check the frame or mat you plan to use. Pick the version that keeps the parts you want to see.
If you use Photos on a Mac, our album and folder lesson shows how to keep a group of pictures together. Give your print set a name you can find again when you are ready to order.