
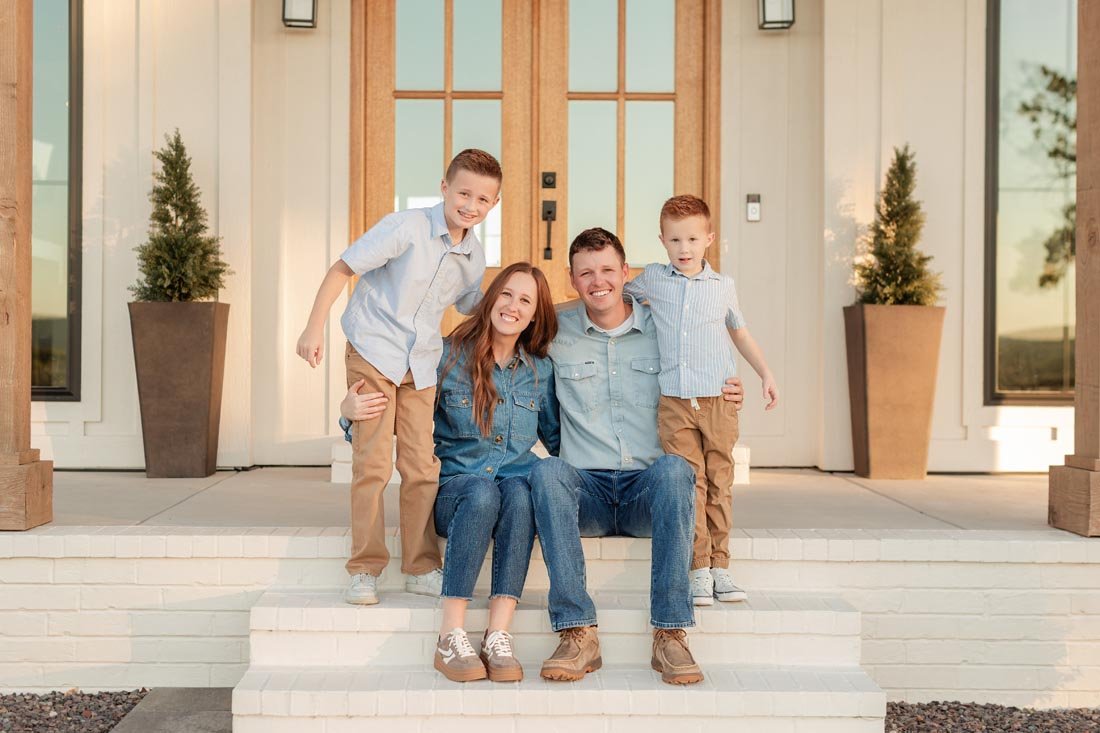
Start with the shape of the group. In this family portrait, the steps let four people sit and stand at different heights while staying close. Each face has its own space in the frame.
This recipe looks at choices you can see in the finished photo. It does not give the camera settings or claim to know every direction used during the session.
Use the steps to build the group
Two adults sit near the center. One child stands on either side, with one higher than the other. Their heads form a loose shape rather than a straight row.
The steps give everyone a place to settle. For your own photo, choose a spot where people can sit or stand with steady footing. Let the group get close without asking anyone to balance on an edge.
Leave room around each face
The people overlap at the shoulders and arms, but you can still see all four faces. The small gaps between their heads help you read the group.
Before taking your frame, look across the faces. If one is hidden behind someone else, ask for a small change. You may only need a slight lean or a shift of your own viewpoint.
Keep that direction brief. Jordan's posing flow leaves room for people to settle into a moment rather than fixing every part of the pose.
Notice the colors and the setting
Blue shirts connect the family. Tan trousers, the light steps and the wood door keep the setting within a small range of colors. The blue has room to stand out.
The doorway frames the group, and the plants sit to either side. Look for a background that gives the people room. Check the edges for objects that cut through a face or pull your attention away.
Try two frames from one starting place
Begin with everyone looking toward the camera. Jordan describes starting with a traditional group photo before moving toward a more relaxed frame in her group-photo lesson.
For your second frame, let the group stay close and give one short prompt, such as looking toward the person beside them. This is a practice idea, not a description of what happened in the source session.
Compare your two photos. Can you see every face? Does the group still feel connected? Keep the parts that work, then change one thing for your next frame.
