
A real estate photography shot list helps you plan the rooms, views, and features to capture at a property. Start with the spaces below, add what makes this home different, and check each view before you leave.
For agents taking their own listing photos, the aim is a clear set that helps a buyer understand the home. The property decides how many photos you need. A second view earns its place when it shows something a buyer needs to understand.
The home photos in this lesson feature a project by DeClue Homes.
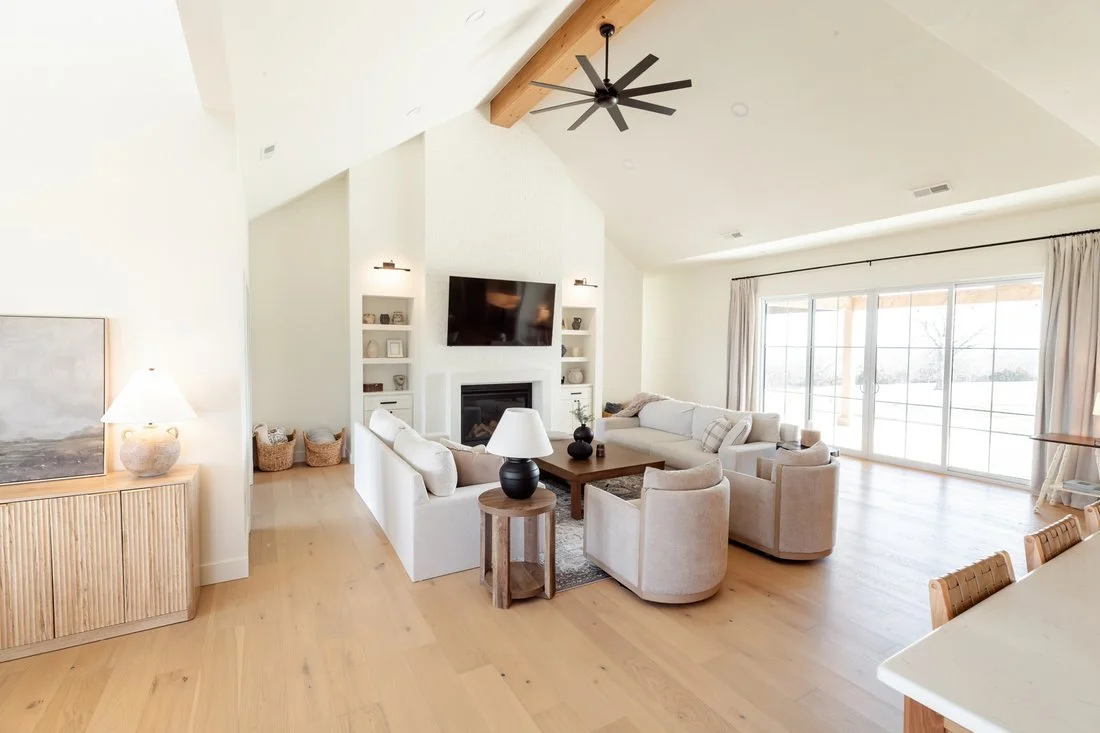
Living room in a project by DeClue Homes.
Start with the room list
Walk through the property before taking photos. Mark spaces that don't apply and add rooms or features that are missing from the table.
| Space | First view | Add another view when it shows… |
|---|---|---|
| Front exterior | The home and approach | A useful feature hidden in the first view |
| Entry | The entrance and nearby space | A connection that explains the layout |
| Living room | The room's layout and main feature | Windows, a fireplace, or a connection you can't see clearly |
| Kitchen | Work surfaces, cabinets, and layout | An island, pantry, or dining connection |
| Dining area | The space and its position | A connection to the kitchen or outdoor area |
| Main bedroom | Layout and window placement | A feature or area hidden by furniture |
| Other bedrooms | A useful view of each room | Something important missing from the first view |
| Bathrooms | Layout and fixtures | A shower, bath, or feature the first view leaves out |
| Laundry or utility space | The useful space and equipment | Storage or room connections |
| Other indoor spaces | Office, storage, or finished basement | A distinct use or feature |
| Rear exterior | The back of the home and usable outdoor space | The shape or connection of an outdoor area |
| Outdoor features | Patio, yard, or outbuildings | A useful feature beyond the main exterior view |
A small apartment and a home with several outbuildings need different coverage. Add garages, stairs, balconies, shared spaces, and separate buildings when they apply. For shared areas, confirm which spaces belong with the listing before adding them to the set.
Want a copy to take with you? The free Listing Photo Field Guide includes this room list, quick shooting checks, and a final review page.
Work through each room
Use the table as your check-off list. These room checks help you decide where another view will help.
Front exterior and entry
Start with a view that shows the shape of the home and its entrance. Check whether a porch, garage, or separate entrance is hidden. Add a view that explains that feature. At the entry, show where the door leads when the view helps someone follow the layout.
Living room and dining area
Show the seating area and the room around it. Check whether the main view includes the fireplace, windows, or outdoor doors. For an open layout, look for one view that shows how the living and dining areas connect. A closer photo of the table adds little if the dining space is still unclear.
Kitchen
Include the cabinets, counters, and space to move through the room. If an island hides the rest of the kitchen, try another position. Check the pantry and any separate work area. Add a photo when that space is useful and missing from the main view.
Bedrooms
Take a clear view of each bedroom. Check whether the bed blocks a window or doorway. Add a second view for a separate sitting area, a walk-in closet, or another feature that needs its own photo. Label rooms in your notes so similar bedrooms stay separate during your final check.
Bathrooms
Check the sink, toilet, shower, and bath against the saved photos. One view may leave a fixture hidden behind a door or wall. Move for another view when needed. Inspect mirrors for your reflection and anything else you didn't mean to include.
Laundry, storage, and other indoor spaces
Check the laundry area, office, garage, and basement one at a time. Show the useful space and its main feature. A finished basement with several areas may need more than one photo. Record any room you cannot reach or photograph clearly on your return list.
Rear exterior and outdoor spaces
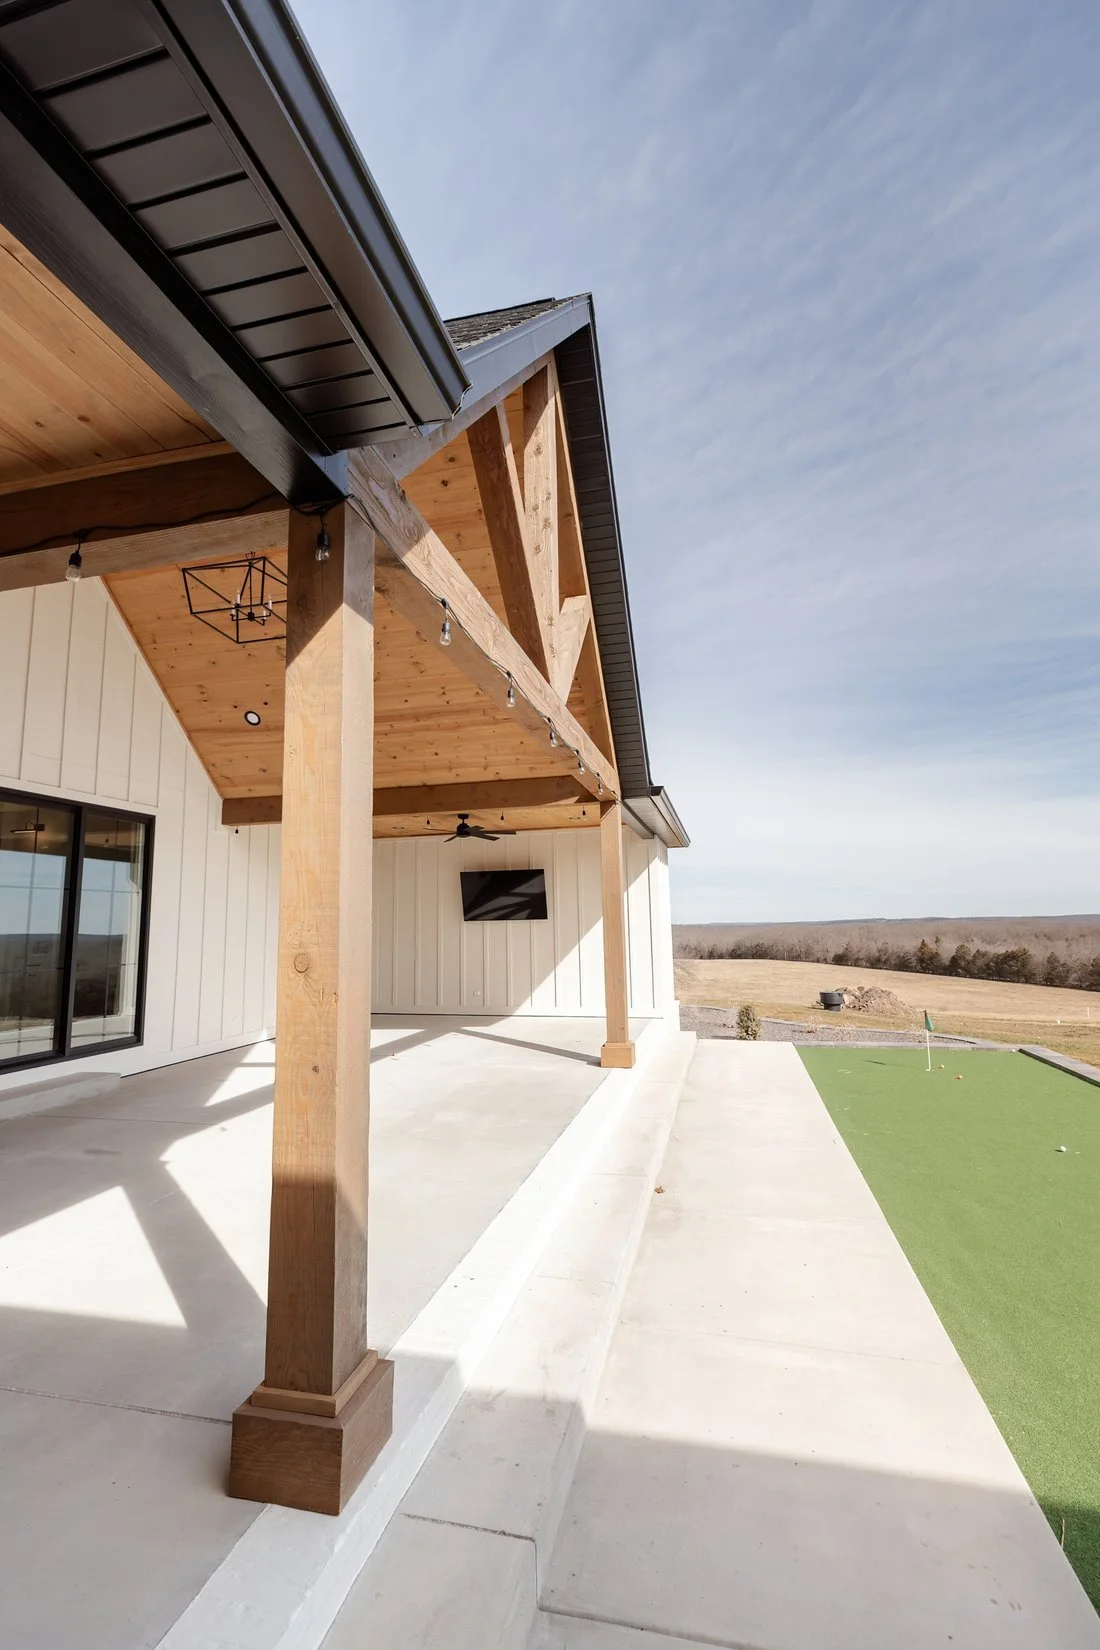
Covered patio in a project by DeClue Homes.
Show the back of the home and how it opens onto the yard, patio, or deck. Then check each outdoor feature on your list. A close view of a covered patio can explain its seating space, but you may still need a wider view to show where it sits beside the home.
Give each photo a job
Before taking another view, finish this sentence: “This photo helps someone see…”
In a kitchen, the answer might be the length of the counters. Another photo might show how the room opens into the living area. Both can be useful because they answer different questions.
Two photos from nearly the same position may repeat the same information. Choose the stronger one unless the second adds something you need.
Record connections between rooms
A room can look clear on its own while its place in the home remains unclear. Look for views that show a useful doorway, opening, or path into the next space.
Keep the main room readable. A doorway is helpful when it explains the layout. It is less useful when most of the photo shows a close wall or furniture edge.
Move the phone and compare views before settling on one. If your phone offers a wide view, check the shapes and sizes of objects near the edges.
Check the light as you work through the list
Take a saved photo and inspect it before moving to the next room. Look at the room's detail, window brightness, and wall color.
If a bright window overwhelms the room, note a return time or another view. If daylight and bulbs give different parts of the room different colors, compare the lights off and on.
For the phone controls, read how to lock focus and exposure on your iPhone camera. Keep your distance similar after locking focus, and choose a new focus when the distance changes.
Keep a return list
Give yourself a short place to record unfinished views:
| Room or feature | What is missing? | Next action |
|---|---|---|
| __________________ | __________________ | __________________ |
| __________________ | __________________ | __________________ |
| __________________ | __________________ | __________________ |
Be specific. “Kitchen” doesn't tell you whether the problem was a missing pantry view, a soft capture, or a bright window. A clear note helps you finish the set.
Review the photos before leaving
Compare your saved set with the room list. Check that each needed space has a clear view. Look at the full frame, then zoom in to check detail.
Check mirrors, edges, leaning walls, and features hidden behind furniture. A quick review can show you which photo needs another capture while the property is still available.
Then choose the order. Start with a clear introduction to the home and group related spaces. Keep the views that help someone understand the property.
Shot-list questions
How many photos do I need for each room?
Start with one clear view. Add another when it shows a useful part of the room or a connection that is missing. A fixed count can leave gaps in a large room and repeat views in a small one.
Should I photograph every closet?
Check storage as you walk through. A walk-in closet or a large storage room may need its own view. A small closet may be clear enough in the room photo. Use the home's features and your listing requirements to decide.
What order should the photos follow?
Start with a clear view of the home. Keep related rooms together so a buyer can follow the layout. Check your listing service's current photo rules before uploading the set.
For your next shoot, write one useful view beside each room before taking the first photo. As you work, check both the list and the saved files.
