For a backlit portrait, start with light behind your subject. Then check the face, the hands and the way the outfit stands against the background. Those choices work together in this photo recipe.
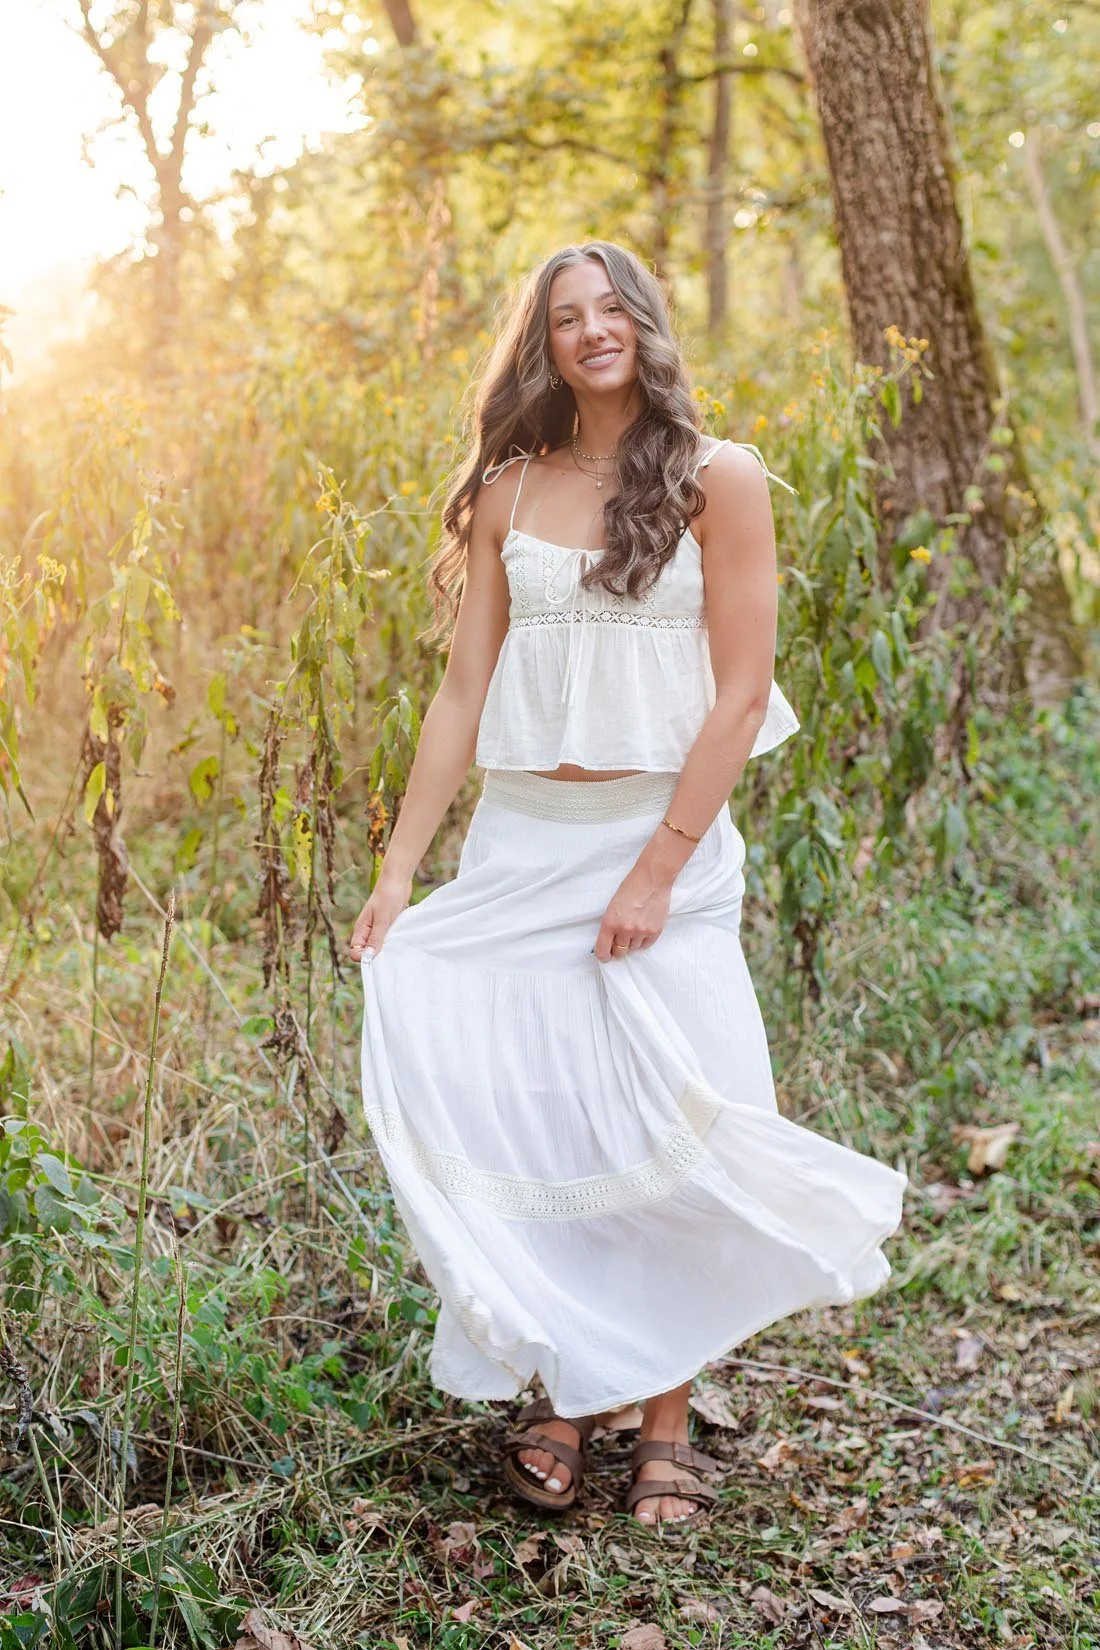
Look at the portrait below. The hair catches light from behind, both hands hold a little skirt fabric, and the white outfit stands out against the trees. We'll break down each part so you can try the choices in your own photos.
Read the light in this backlit portrait
The bright edge of the hair gives us a clue. Light comes from behind her on the left side of the photo. You can also see a bright patch of light through the trees in that part of the frame.
This is backlight: light that reaches the subject from behind. It can make the edges of hair look bright, as Tamron's guide to backlighting explains. In this portrait, you can still see detail in her face.
Check both.
Keep light on the face
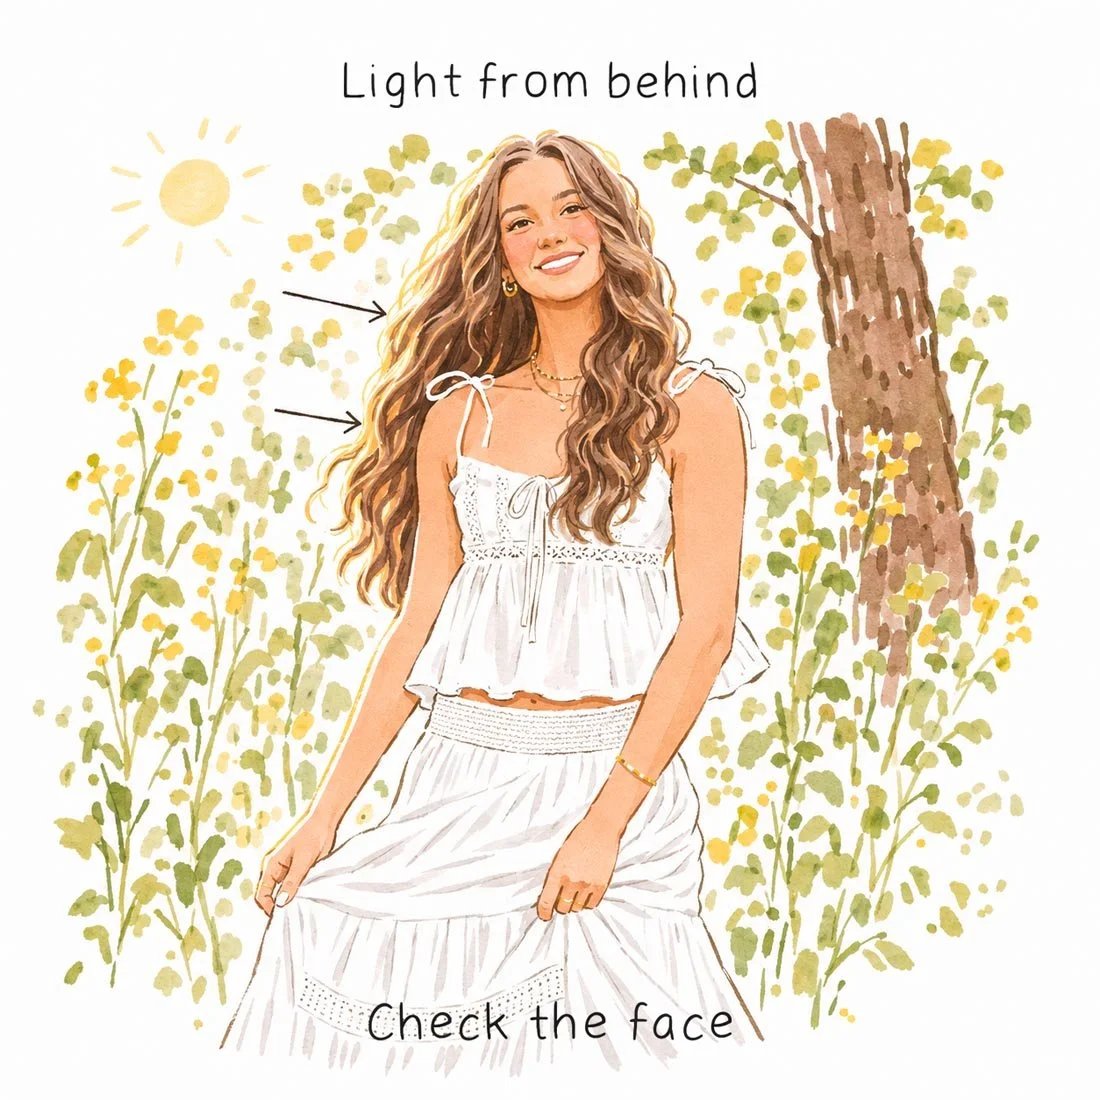
When you try this, place your helper with the sun behind them. Look at their hair, then look at their face. If the face needs more light, try a spot facing open sky, a pale surface that bounces light back, or a reflector in front.
The drawing follows this portrait. Its arrows point toward the bright edge of the hair on the left. Check that light reaches the face while sunlight lights the hair from behind.
Sony's backlit portrait lesson shows how light behind a person can outline their hair and why you may add light to the face. Our portrait light direction lesson helps you compare light from the front, side and back.
Give the hands one clear action
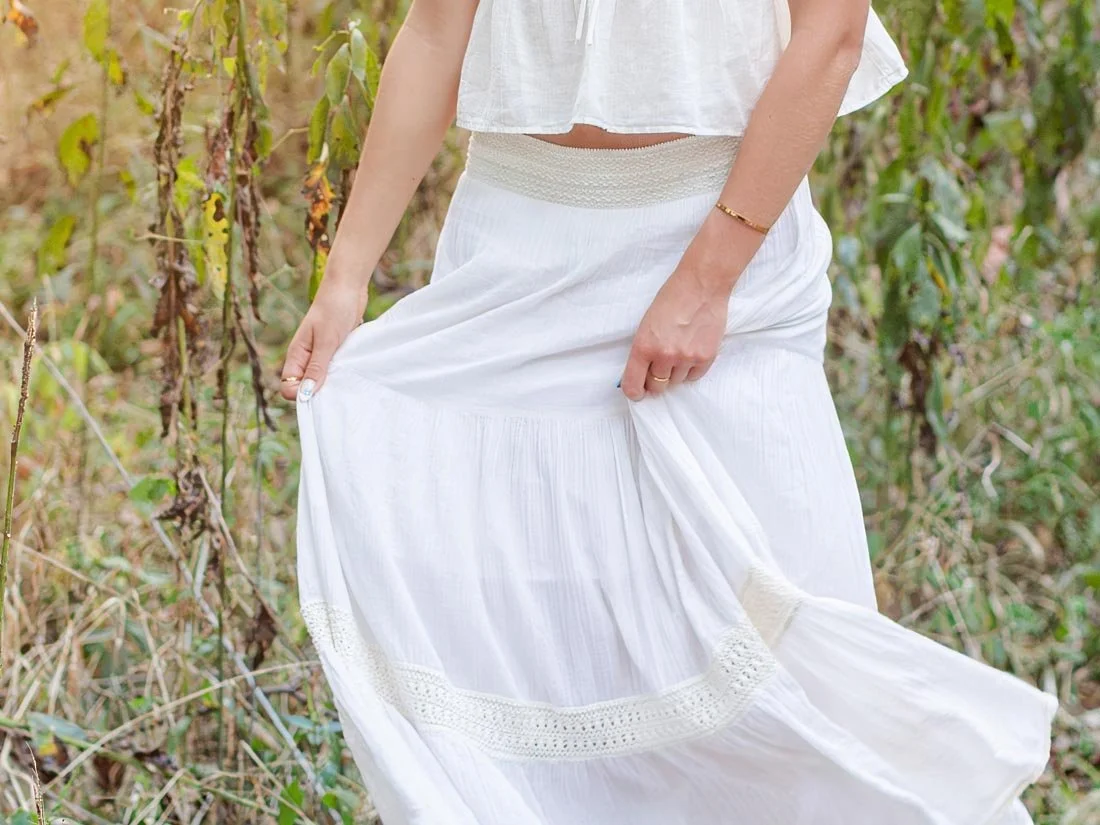
Look at where each hand rests. Both hold the skirt, with a small amount of fabric between the fingers. The hands have a clear action, and the fabric opens into a curve.
For your version, try this prompt: "Hold a little of your skirt at each side. Let your arms stay loose." Give the person time to settle before you add another instruction.
Watch the grip. If they pull the fabric tight, ask for a smaller hold. Check that the arms feel comfortable and the skirt falls the way they want it to.
Look closely at the grip
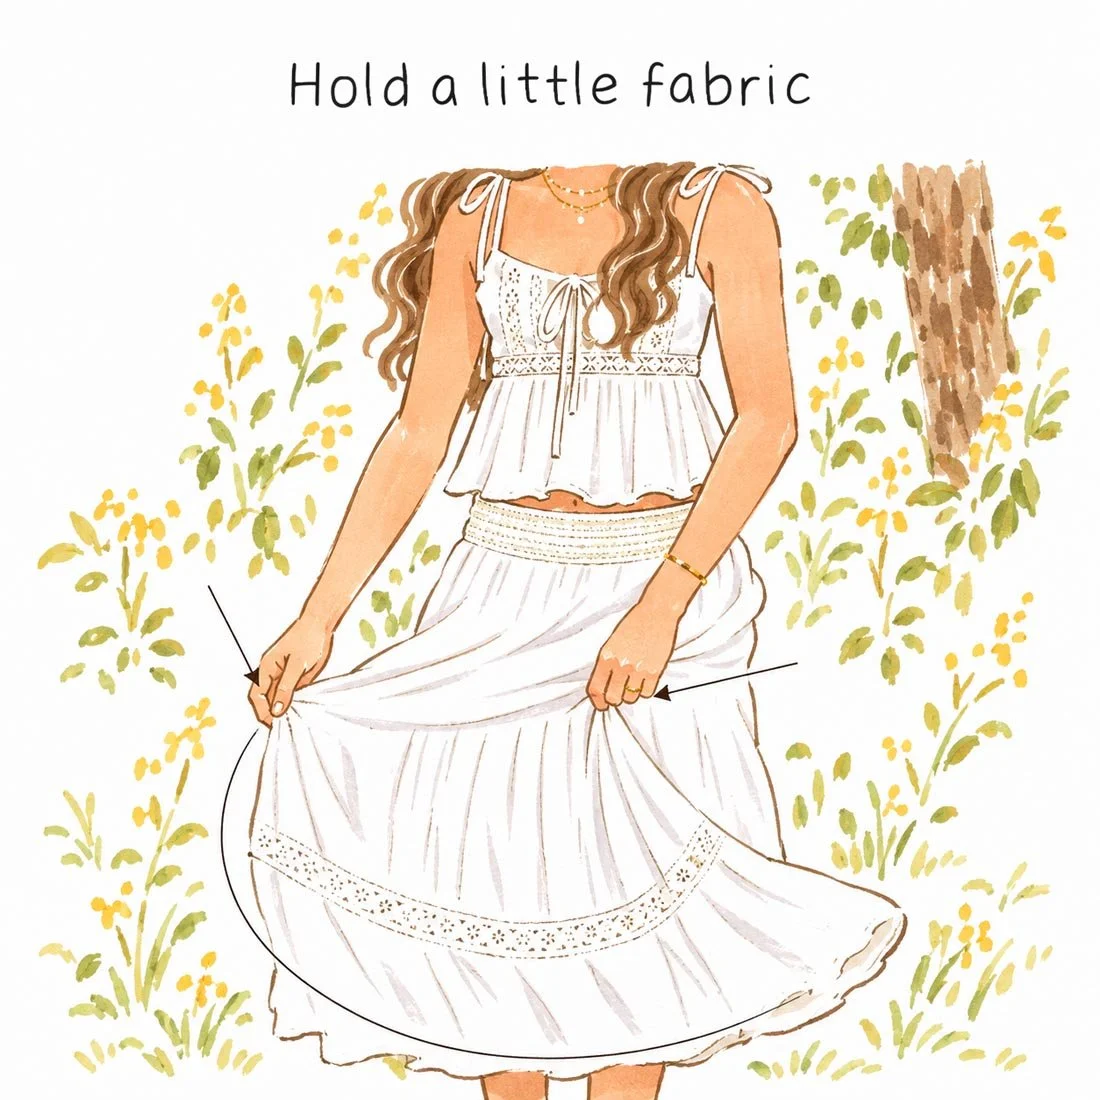
The drawing marks the two places where her hands hold the skirt. Compare those grips with the detail from the photo below.
You can study the curve without assuming how it happened. One still photo doesn't tell us whether the skirt was moving or held in place.
Our lesson on natural posing uses the same starting idea: give a clear action, watch the response and choose the next prompt from what you see.
Use the outfit and background together
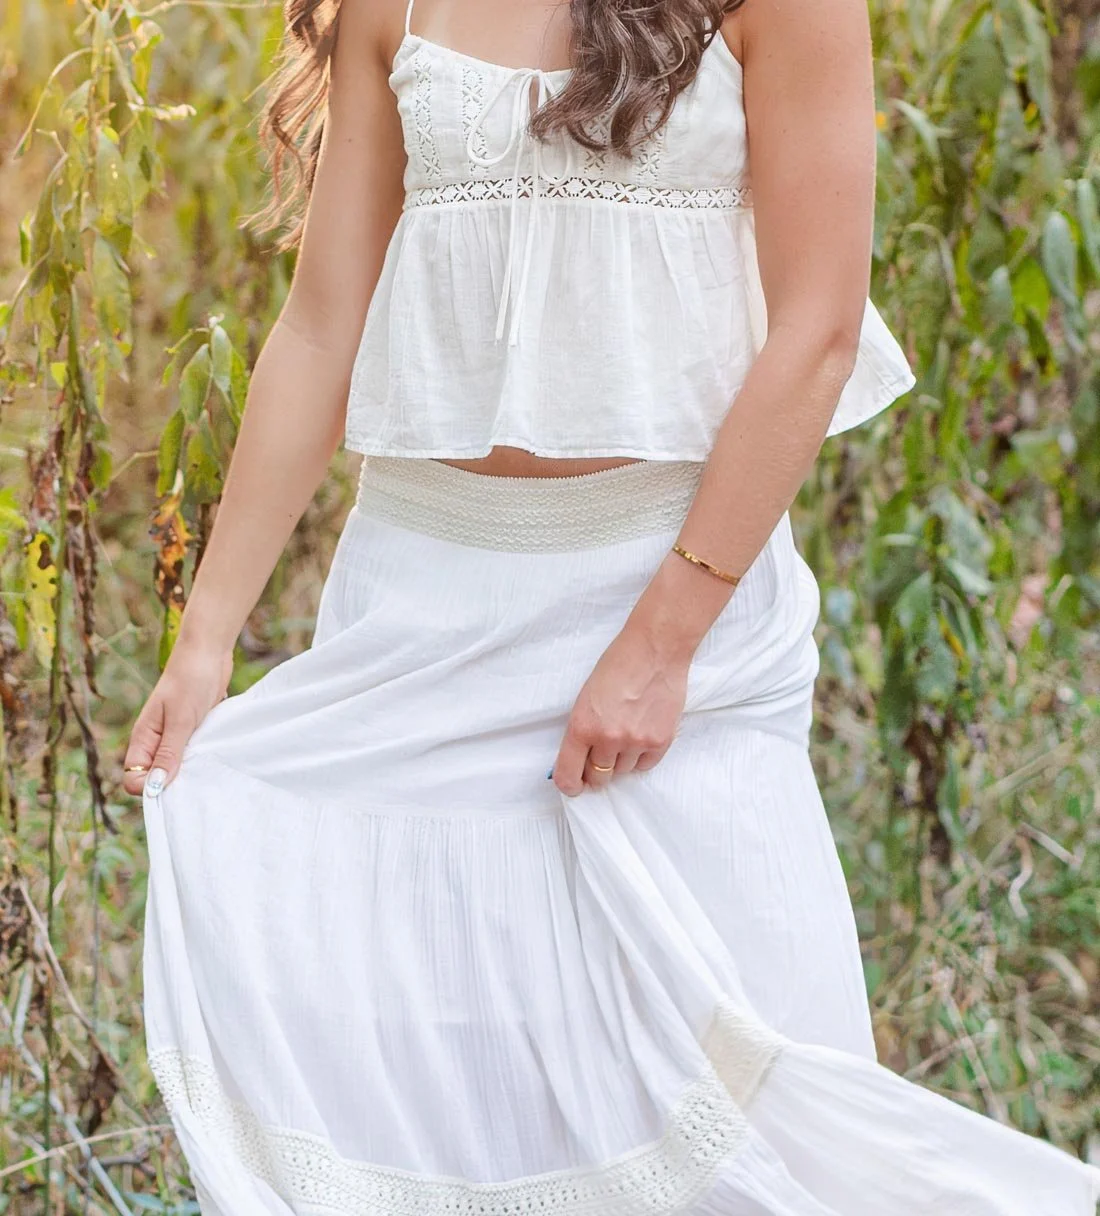
The white top and long skirt stand out against the green and gold plants. The outfit has lace, seams and folds, so there is detail to look at within the white fabric.
Look at the clothes and the place together.
Before you make your own frame, check what sits behind the outfit. A small change in your camera position may place a dark tree trunk, a patch of green or a bright gap behind the person. Choose the part that helps you see the clothes and pose.
Check bright skin and white fabric
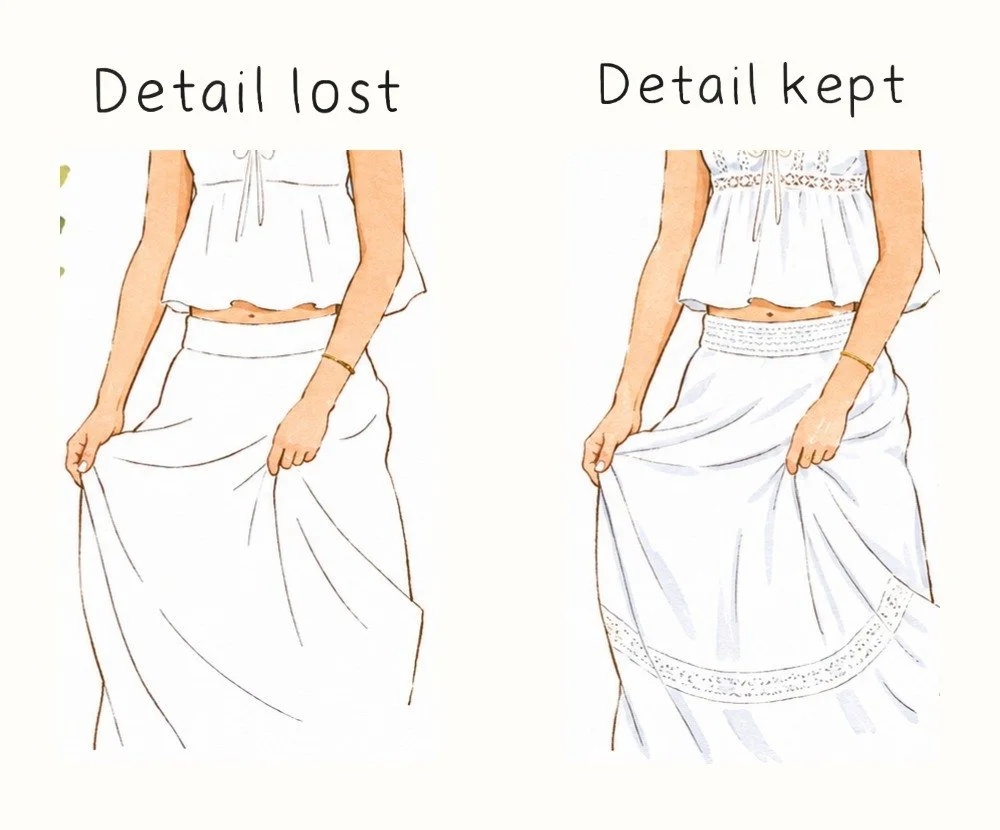
The illustrated pair uses this outfit to compare lost fabric detail with detail kept. Look at the lace, textured waistband and folds. This is a drawn example of what to check in your own photo.
Then check the brightest fabric. Can you still see the folds and lace you want to keep? If those areas turn into a blank patch, review your exposure and the light reaching the person.
This white outfit is one option. With another color or fabric, make the same check: can you see the person, the shape of the outfit and the details you want to show? For your own edits, you can also try Jordan Brittley's presets. Start with a preset, then adjust it to suit your photo.
Frame the skirt and the place
The full photo includes the skirt's lower edge, the sandals and some ground below them. Trees and plants show the setting around the person.
When the skirt is part of your lesson, leave room for its shape. Look around the frame before taking the photo. Check the top of the head, both hands, the fabric and the feet.
A closer frame can show the face or hand position. A wider one shows more of the outfit and place. The detail views in this lesson are crops of the same photo.
Try this photo recipe in two frames
Work with someone who wants to try the pose and wears a skirt they can hold comfortably. Choose steady ground and a spot where light reaches the back of their hair.
- Set the light. Place the sun behind them. Check the face and bright fabric, then take a test photo.
- Make the first frame. Ask them to stand comfortably with their hands at rest.
- Add the hand action. Ask them to hold a little skirt fabric at each side. Keep your camera position and framing the same.
- Compare the two. Look at the hands, the shape of the skirt and the space around the arms. Which frame gives you the shape you want?
If the light changes during your test, check the face again before comparing the pose. Our golden hour portrait lesson goes deeper into changing light, flare and camera settings.
Questions about this photo recipe
What is backlight in a portrait?
Backlight comes from behind the person. It can make the edges of their hair or clothing bright while the face receives light from another direction.
Which side does the light come from here?
It comes from behind her on the left side of the photo. The bright hair edge and bright background on that side support that observation.
Do I need a reflector?
Check the light on the face first. Open sky or a pale surface may give you enough light; a reflector is another option when the face needs more.
What camera settings made this photo?
This recipe studies the visible light, pose and styling. It doesn't list capture settings, so choose settings for your own light, subject movement and focus needs.
Does the outfit need to be white?
You can try another color. Look at it against the background and check that the fabric details you want remain visible.
Start with the two-frame test. Keep the light and framing steady, change the hand action, and choose the skirt shape you like.