Winter photography ideas can start with a snowy path, a warm coat or the Christmas lights you already have up. Pick one subject, then choose what you want to show: the place, the people or a small detail.
These 12 ideas include outdoor portraits, couples and Christmas scenes you can try indoors. You'll see Sri and Chris's winter engagement session in St. Louis, Brittany and Aaron's snowy engagement photos, Sophie's snow-day portraits, and holiday details at 14 & Main Event Venue.
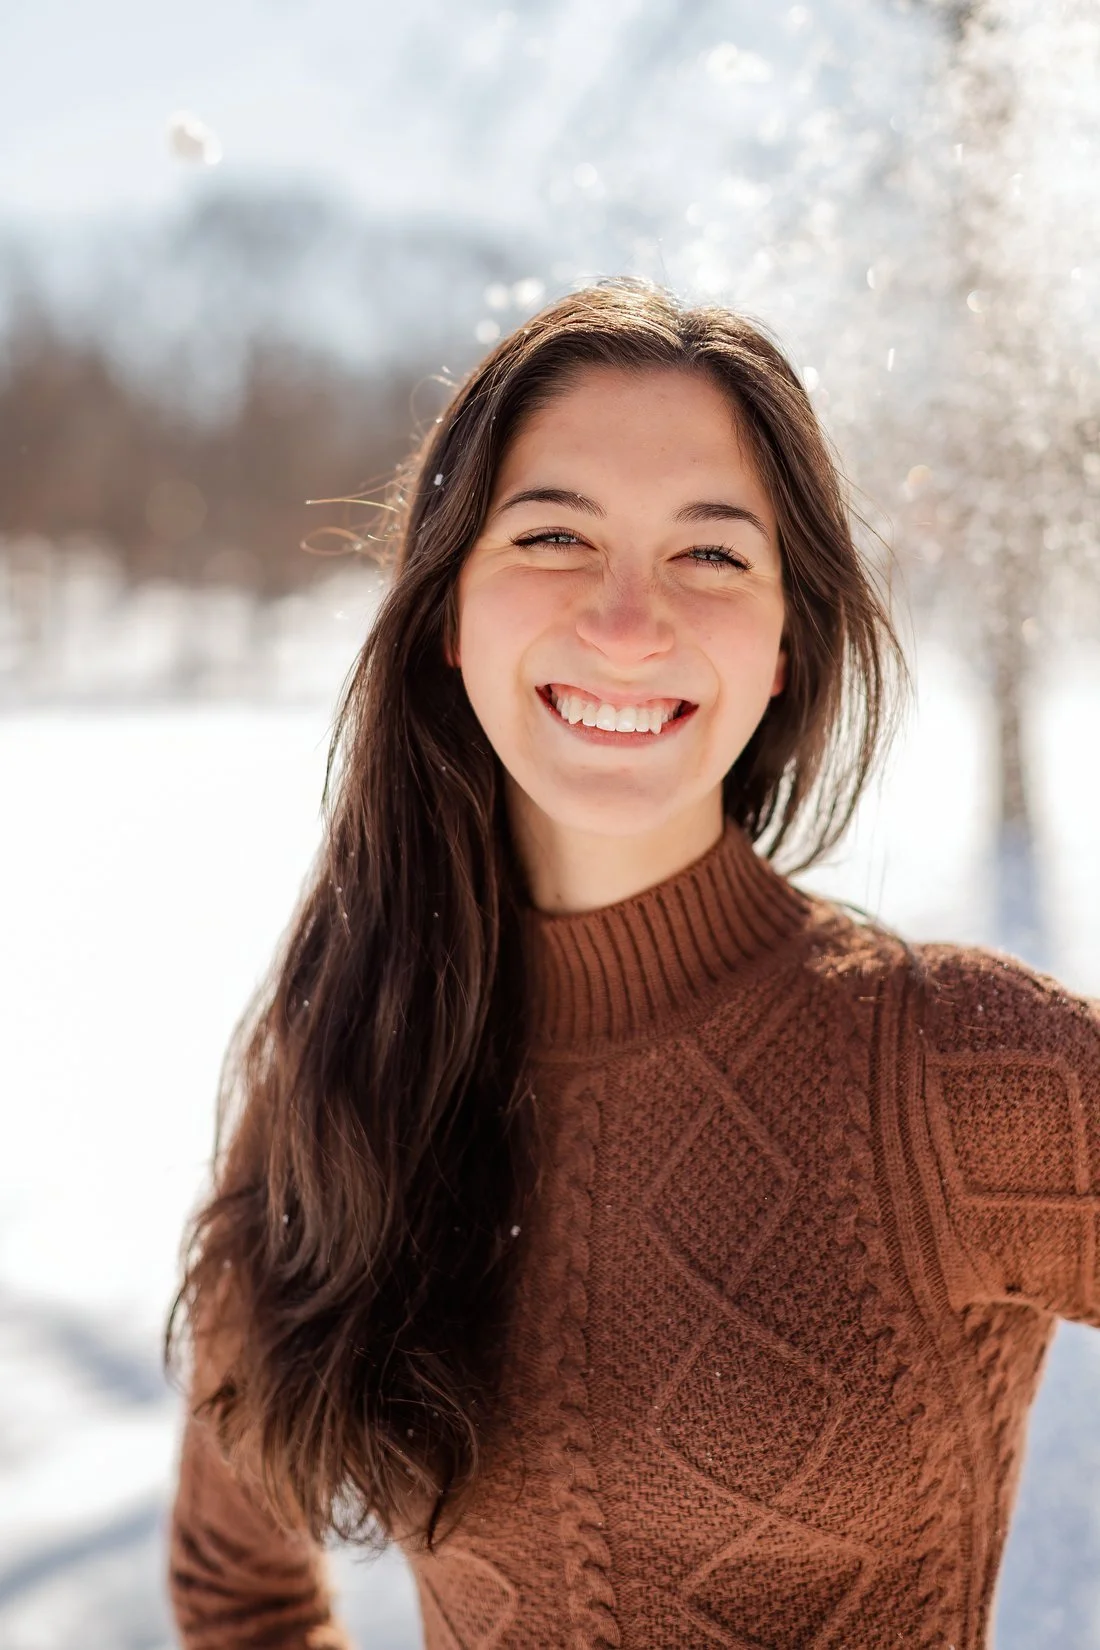
Sophie’s snow-day portrait: a close view keeps the face and knit clear against the snow.
Winter photography ideas for snow and bare trees
1. Leave room for the snow
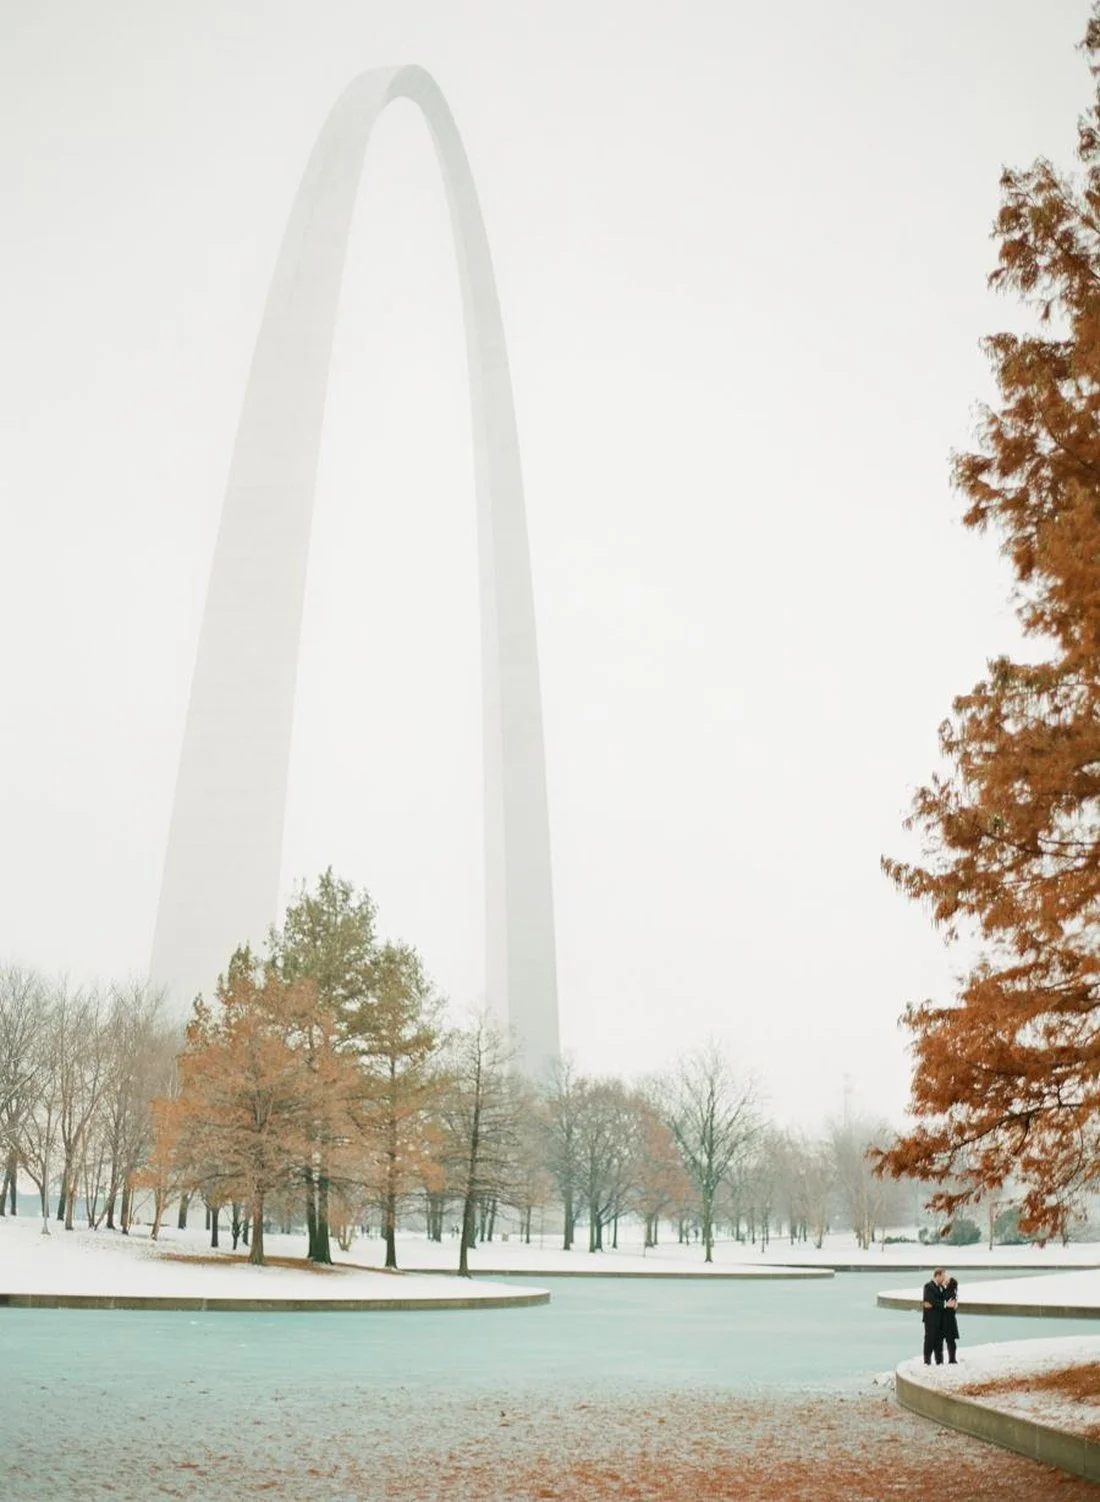
Sri and Chris’s winter engagement session in St. Louis.
Step back for a full-length portrait and include the ground around your subject. Look for a path, a row of trees or a stretch of fresh snow that gives the person a clear place in the frame.
In Sri and Chris's engagement photo near the Gateway Arch, the couple is small in the frame. The snow, trees and paths show the setting around them. Try a wide view and a closer portrait while your subjects stay in the same spot.
2. Let a warm color stand out
A brown sweater, red scarf or green coat can give you a clear subject against pale snow. Start with clothes the person already has and can wear in the cold.
Look at the brown knit in Sophie's color portraits. The snow gives the sweater and face space to stand out. Check behind the head before you take the photo. A small step can move a dark branch away from a cheek or eye.
3. Put falling snow against a dark background
If snow is falling, try a view with dark trees or a shaded building behind it. Pale flakes are harder to see against a white sky.
Take a photo and check the flakes as well as the face. A faster shutter speed can show more separate flakes. A slower one can show short streaks. The result depends on the snowfall, wind and distance, so compare actual frames. Keep the lens dry and stay out of falling branches.
4. Photograph the shadows of bare branches
On a sunny day, look down at the snow. Branch shadows can give you lines to work with even when the trees themselves are outside the frame.
Try one photo of the pattern on its own. Then include boots or a person beside it. Move until the shadows sit where you want them. Watch your own shadow too, especially when the sun is low behind you.
Winter portrait ideas for couples and friends
5. Move in for a close couple portrait
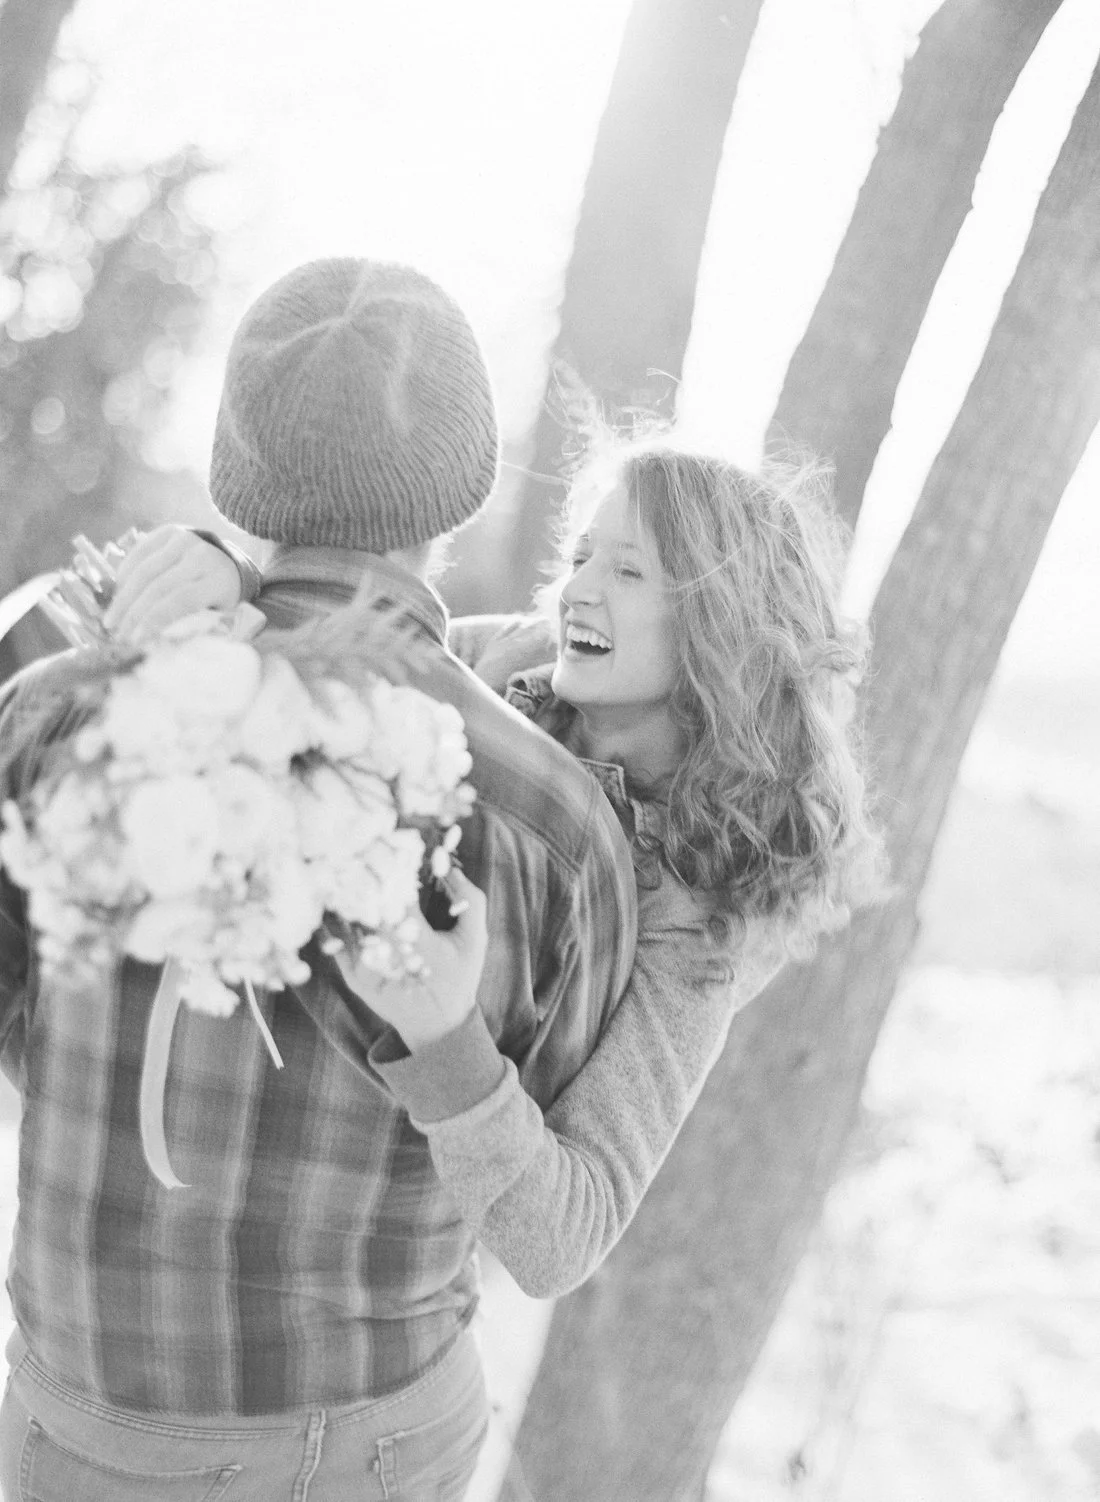
Brittany and Aaron’s snowy engagement session.
Ask the couple to stand close, then frame their faces and shoulders. Give them something to do, such as looking at each other or resting their heads together.
Brittany and Aaron's snowy engagement photo keeps the couple close, with a knit hat and sweater in view. Try a close frame that includes the winter layers. If both faces need to be sharp, keep them near the same distance from the camera and check both sets of eyes.
6. Give people something to do
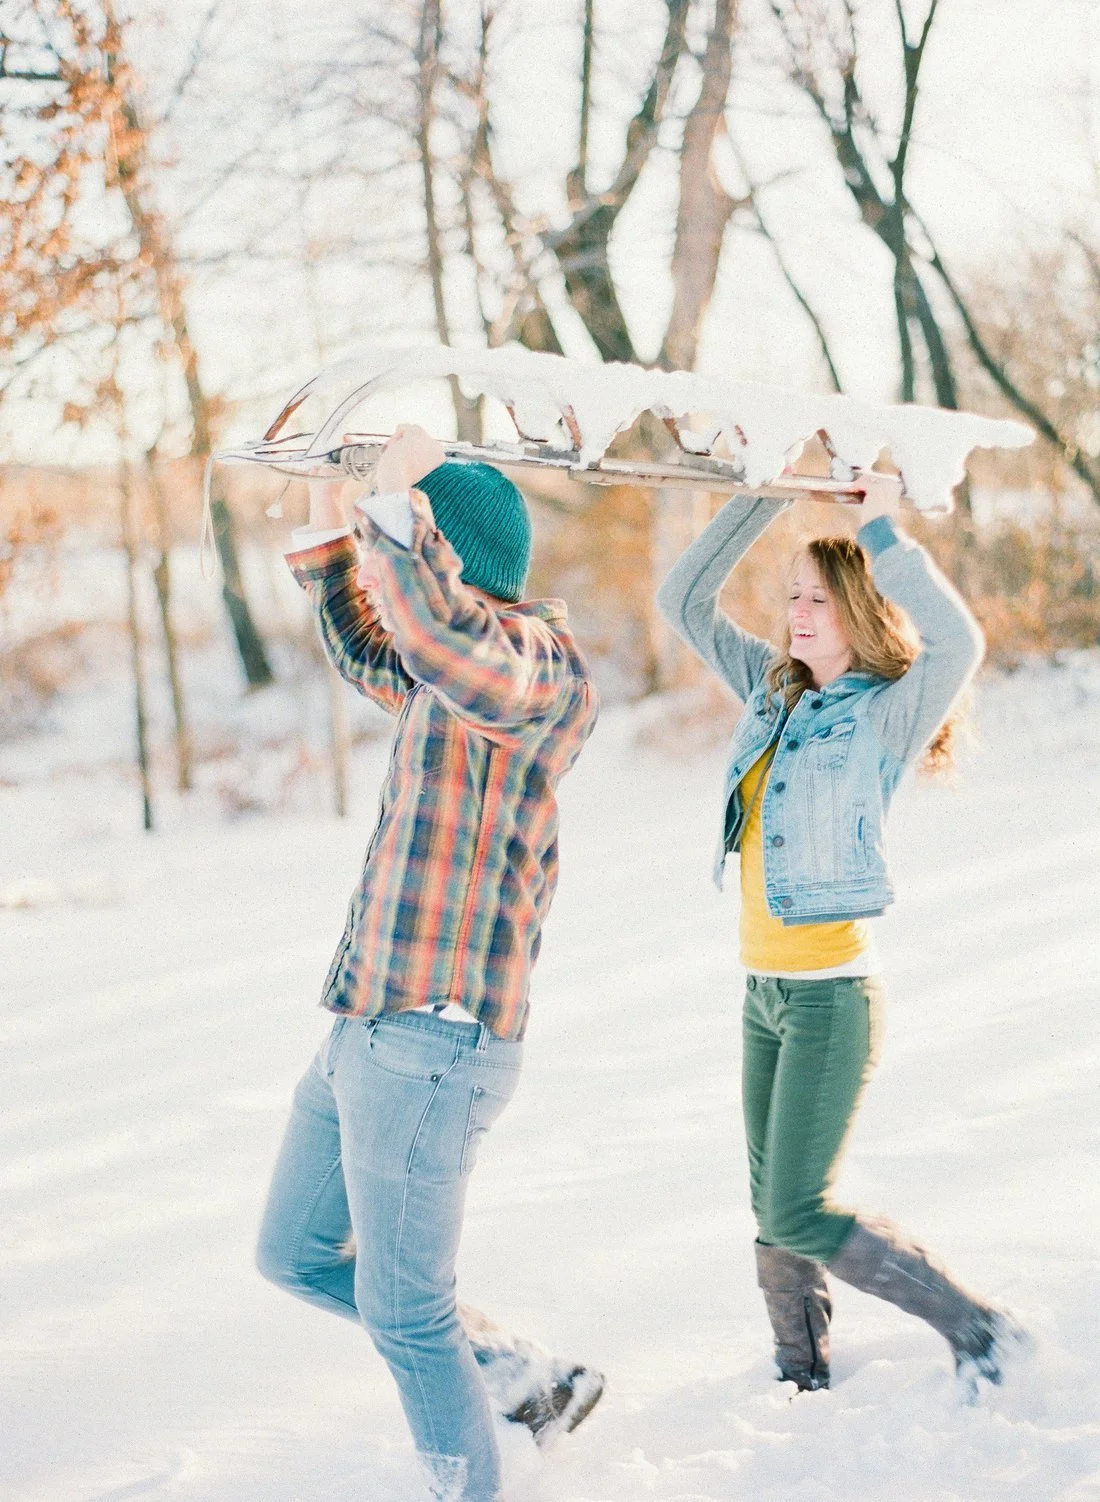
Brittany and Aaron lift a blanket together for a snowy portrait.
Brittany and Aaron lift a blanket above them in one snowy portrait. Give your subjects one action, then watch their faces as they do it. You can also choose a clear, steady path and ask them to walk toward you. Take a few frames, then check for motion blur.
For walking people, 1/500 second is a starting point to test. Change it for the pace, lens and light. Our shutter speed lesson for moving people explains what to check. Skip icy ground and keep the route short enough for people to stay comfortable.
7. Make one photo about hands and winter layers
Photograph linked hands, mittens around a mug or a hand pulling a scarf into place. Choose one action so the crop has a clear point.
Leave enough room to show what the hands are doing. Avoid cutting through fingers or crowding the edge of a mug. If you include a hot drink, let the person hold it safely before you start directing the photo.
8. Look for face light on a cloudy day
Make a portrait with bare trees or evergreens behind your subject. Look at the face and clothing to find which side receives more light. Ask for a small turn and compare.
Jordan's overcast-day teaching uses the brighter side of clothing to help find that direction. Clouds don't remove the need to look at the light. Our cloudy-day portrait lesson gives you a full practice exercise.
Christmas photography ideas you can try indoors
9. Focus on an ornament with lights behind it
Choose an ornament or a small decoration, then put some distance between it and the lights behind it. Focus on the decoration. Try a low f-number if your lens allows it, and check whether the background lights look as soft as you want.
Nikon's holiday bokeh guide shows how out-of-focus lights form soft bright shapes. You can also try an abstract frame made only of blurred lights. Keep that separate from the photo where the ornament stays sharp.
10. Show one part of the decorated room
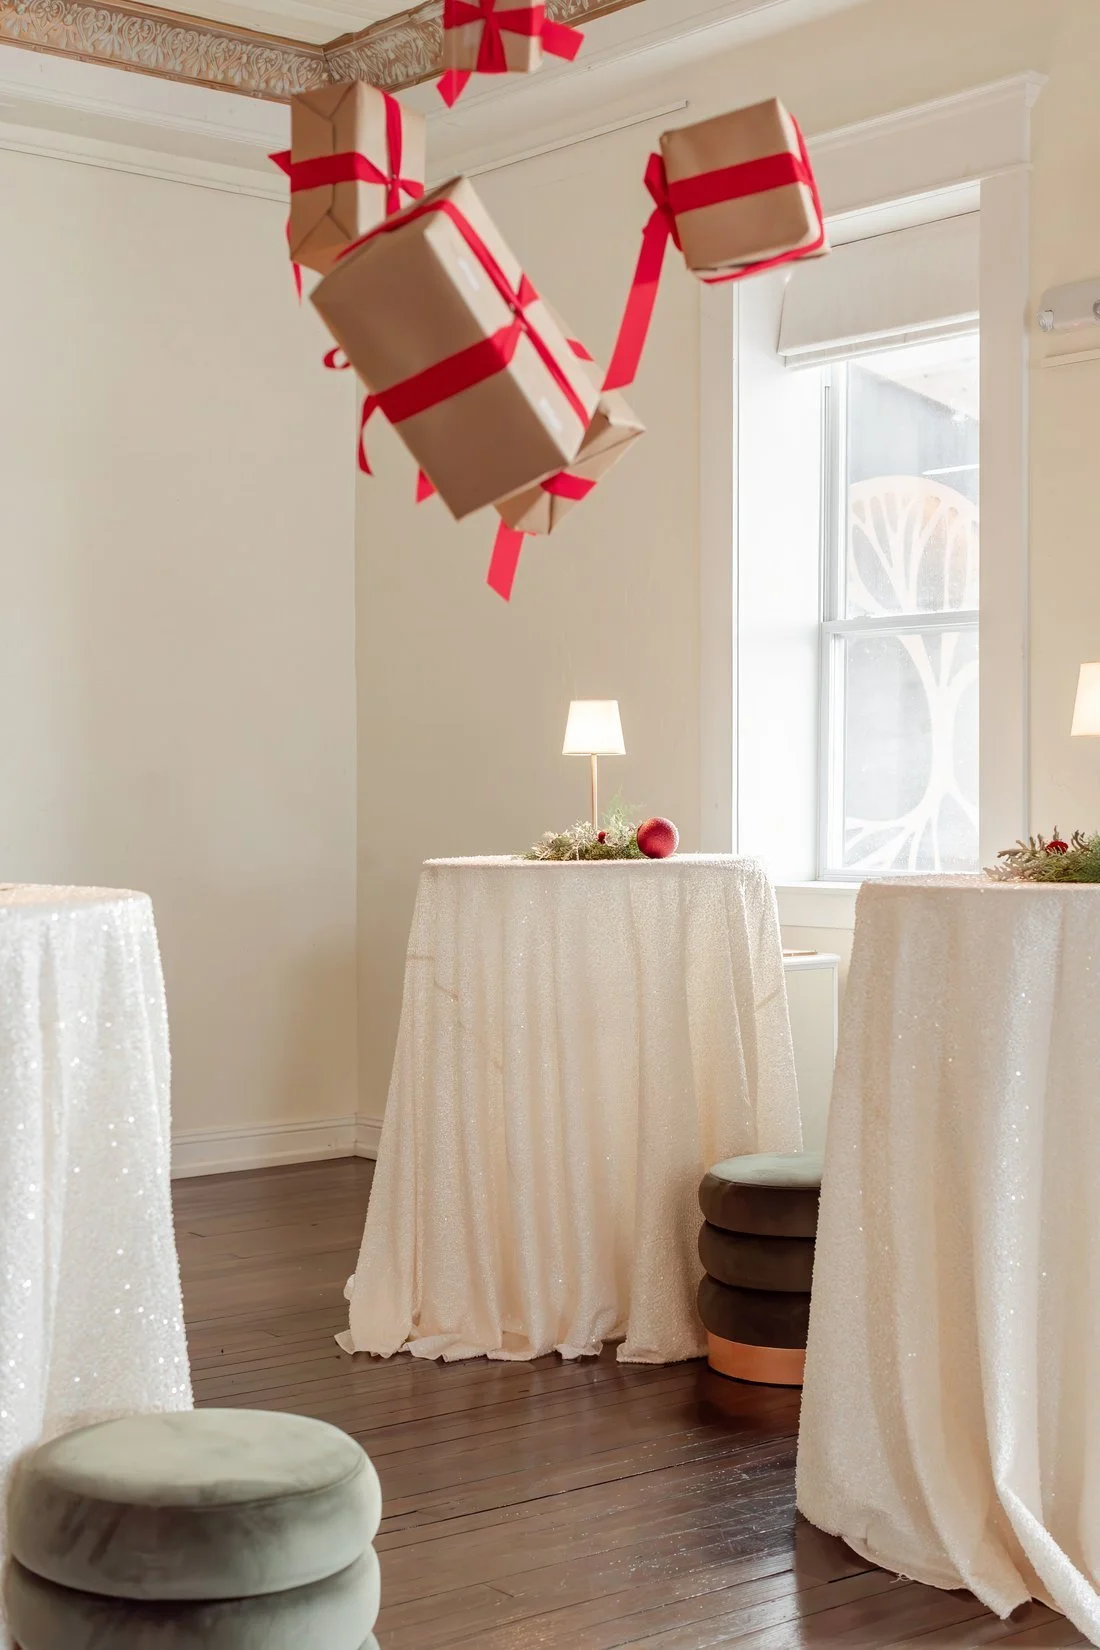
Christmas room details at 14 & Main Event Venue.
You can make a Christmas photo without fitting the whole room into it. Try a window with hanging gifts, a tree beside a chair or one decorated corner.
The hanging presents at 14 & Main show how the decorations can fill the upper part of the photo while the room stays visible below. For your own frame, check the outer edges for a cut-off gift, tree topper or bright lamp. Move before you change lenses.
If you photograph lights in a dim room, support the camera when you need a slow shutter speed. Canon's holiday-light guide explains how direct flash can reduce the look of the lights. A still room and a person moving through it need different shutter speeds.
11. Move close to a holiday detail
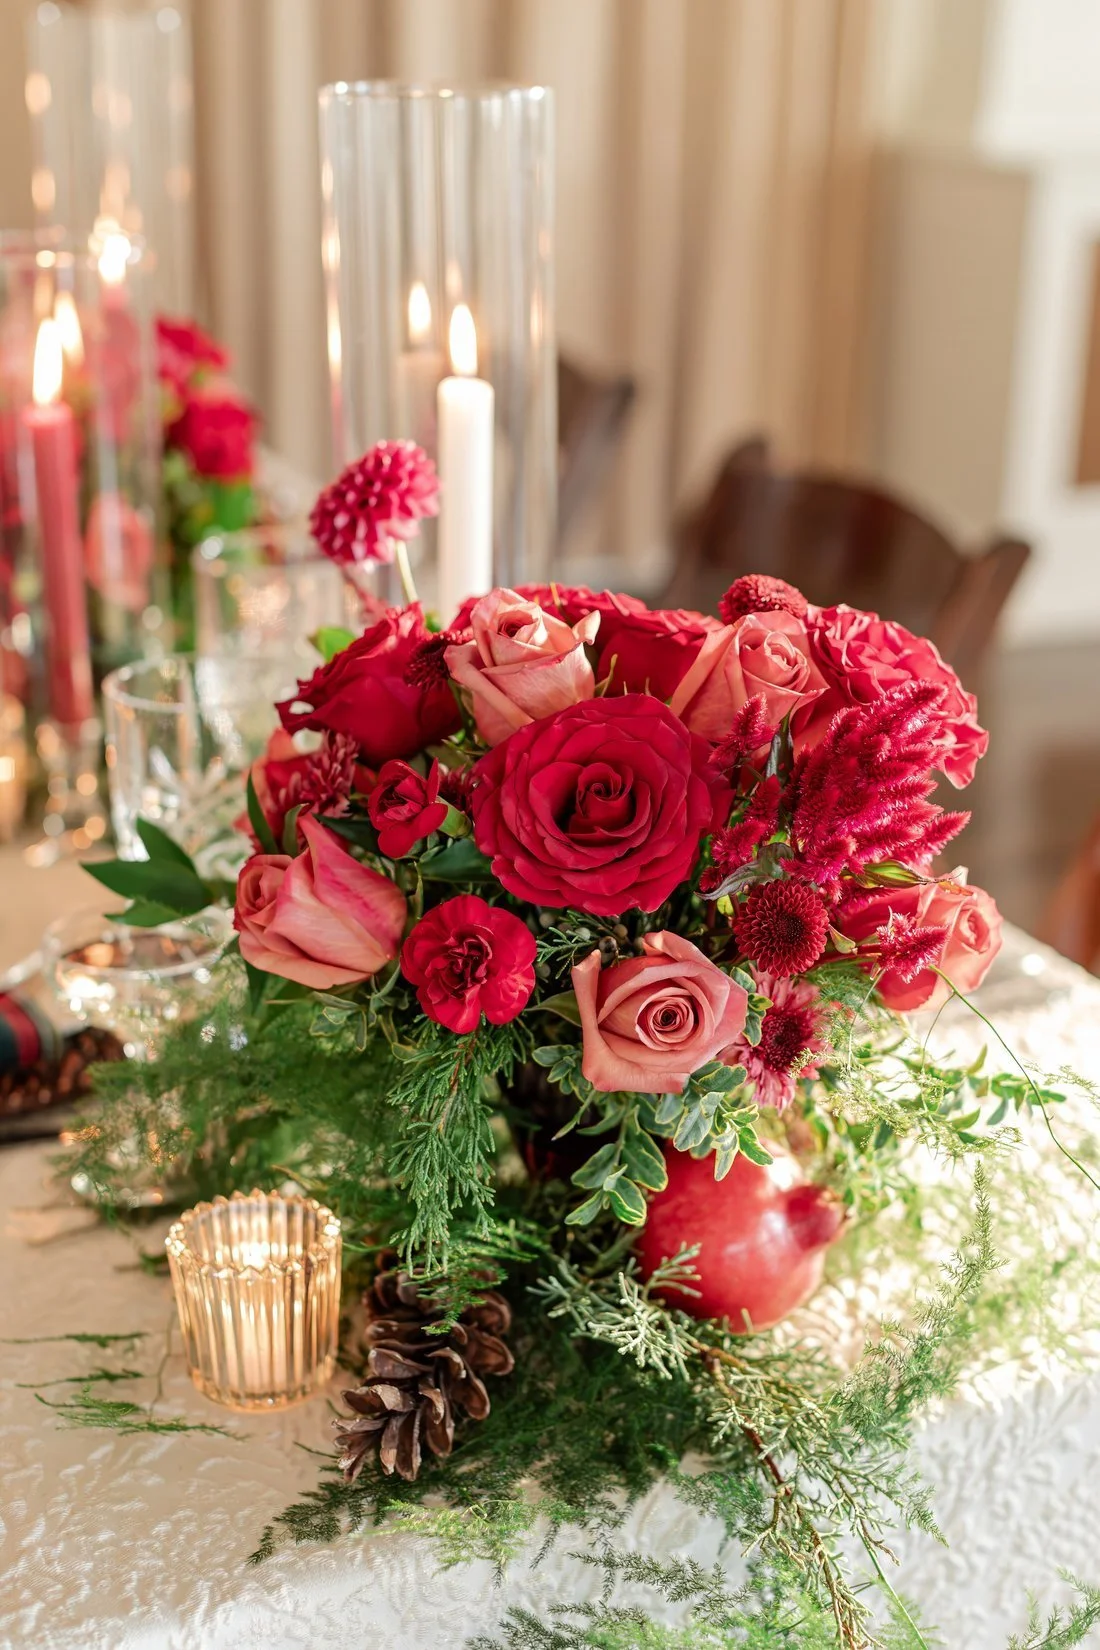
Holiday flowers and greenery at 14 & Main Event Venue.
Pick a ribbon, a place card, evergreen branches or a flower arrangement. Move close enough that someone can see the texture. Keep a little surrounding detail when it helps show the setting.
The red flowers, greenery and candlelight at 14 & Main give you several subjects in one small area. Choose the main one, then focus there. Take a second photo from a lower or higher angle and compare what overlaps in the background.
12. Take a wide table photo and a close one
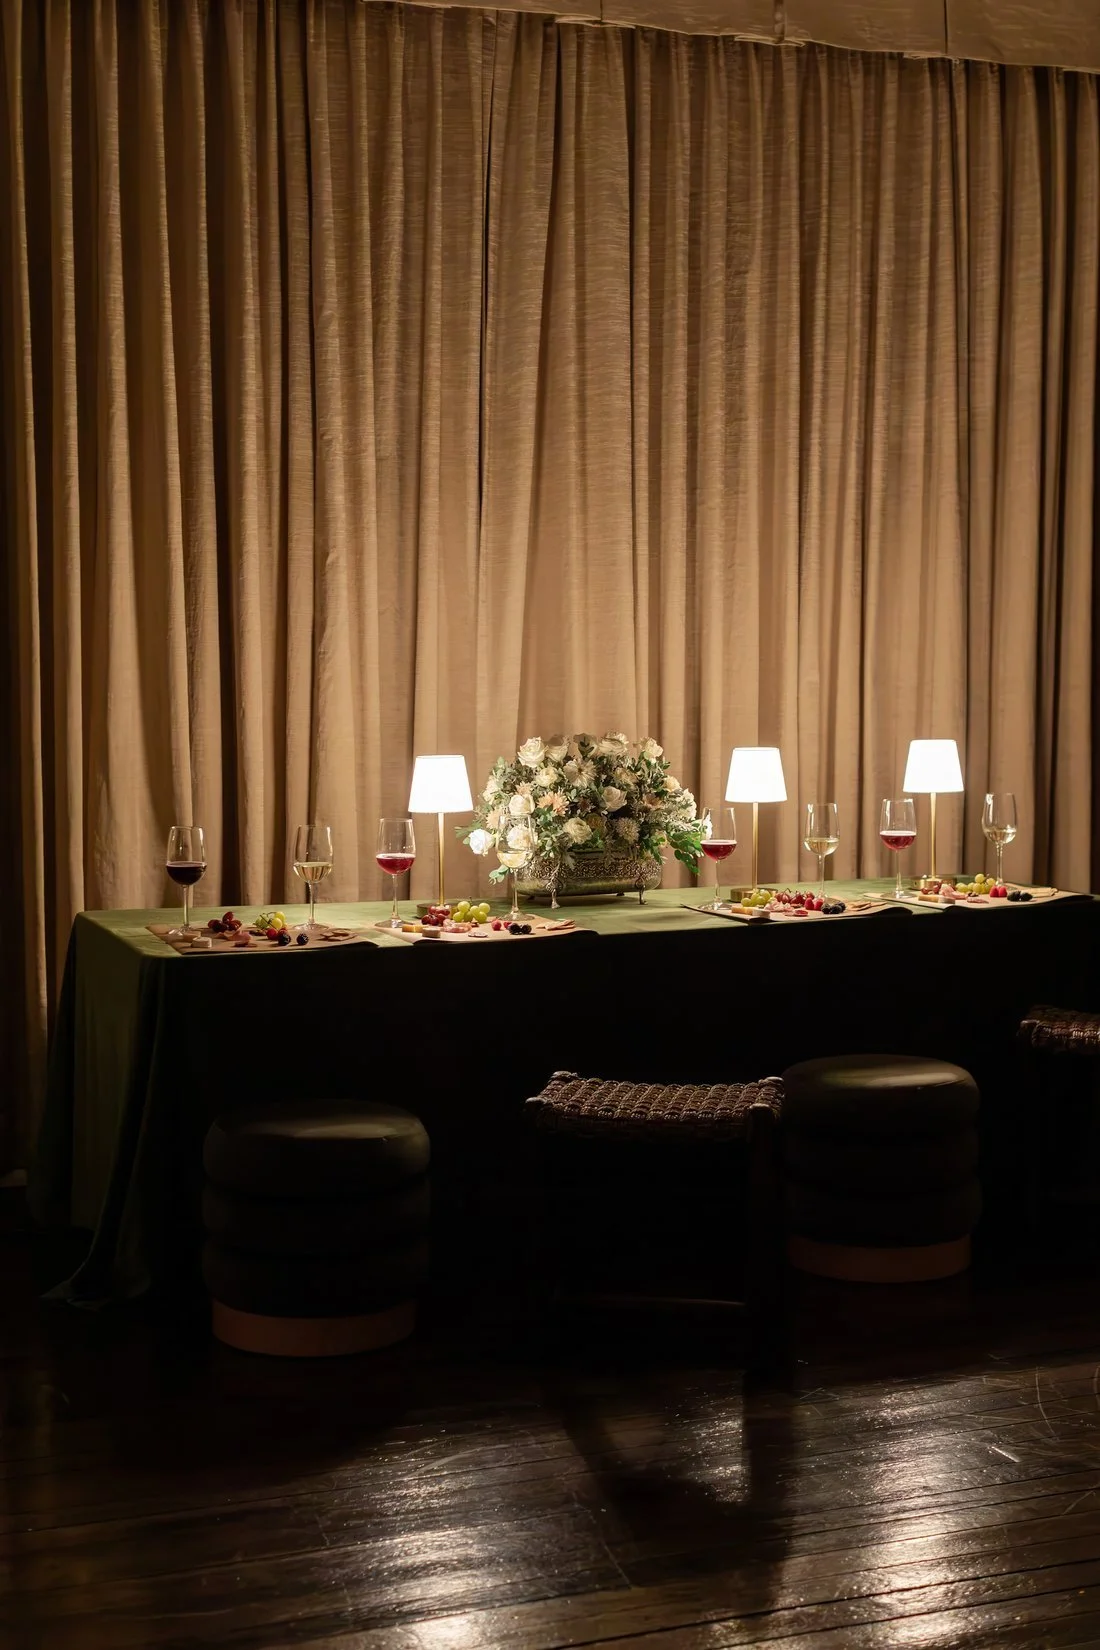
The holiday table at 14 & Main Event Venue includes the chairs, lamps and greenery.
Photograph the table before people sit down, then move in for one place setting or a small action. Hands reaching for a drink can give you a different photo from the room view.
The long table at 14 & Main shows the chairs, lamps and greenery together. For your own holiday table, compare a wide frame with one that shows a single plate or glass. When you use window light, look at how it reaches both the subject and the background. Jordan's light and airy process explains why both belong in that choice.
Check light and exposure before you keep shooting
Snow and Christmas lights can both lead to bright areas with little detail. Take a test photo before making a long series.
If the snow looks too dark, try a small amount of positive exposure compensation in a mode that supports it. That control asks the camera for a brighter result. Check the face and snow again. Canon's snow photography guide explains how the meter can darken a bright snow scene and how to check the highlights.
No one setting fits every winter photo.
For color, look at the skin as well as the snow. Shade can look cool, while indoor lights can look warm. Our Lightroom white balance lesson explains how to check a color cast. Keep the winter color you want without making every face orange or blue.
Pack warm layers and a charged spare battery. Keep the spare warm and check your camera's weather and temperature limits. Nikon's cold-weather tips cover batteries, snow and working outdoors.
Questions about winter photography
What can I photograph in winter without snow?
Try bare branches, evergreens, a window-light portrait or a decorated room. Clothes, light and small holiday details can show the season without snow on the ground.
Can I try these ideas with a phone?
Yes. Start with the framing and the light. Tap the main subject to focus, adjust brightness when needed, then check the saved photo for sharpness and bright areas with lost detail.
What should people wear for a snowy photo session?
Choose layers suited to the actual weather. A coat, scarf or knit can also give the photo color and texture. Keep warm clothing nearby for breaks if someone removes a layer for a frame.
Should every winter photo have bright white snow?
Snow can look cool in shade or warm near sunset. Decide which color and brightness fit the photo, then check the skin and any snow detail you want to keep.
How do I choose which winter photography idea to try first?
Use the light and subject you have today. For one idea, take a wide photo, a closer view and a detail. Compare what each frame shows, then keep the one that best shows what you wanted to photograph.